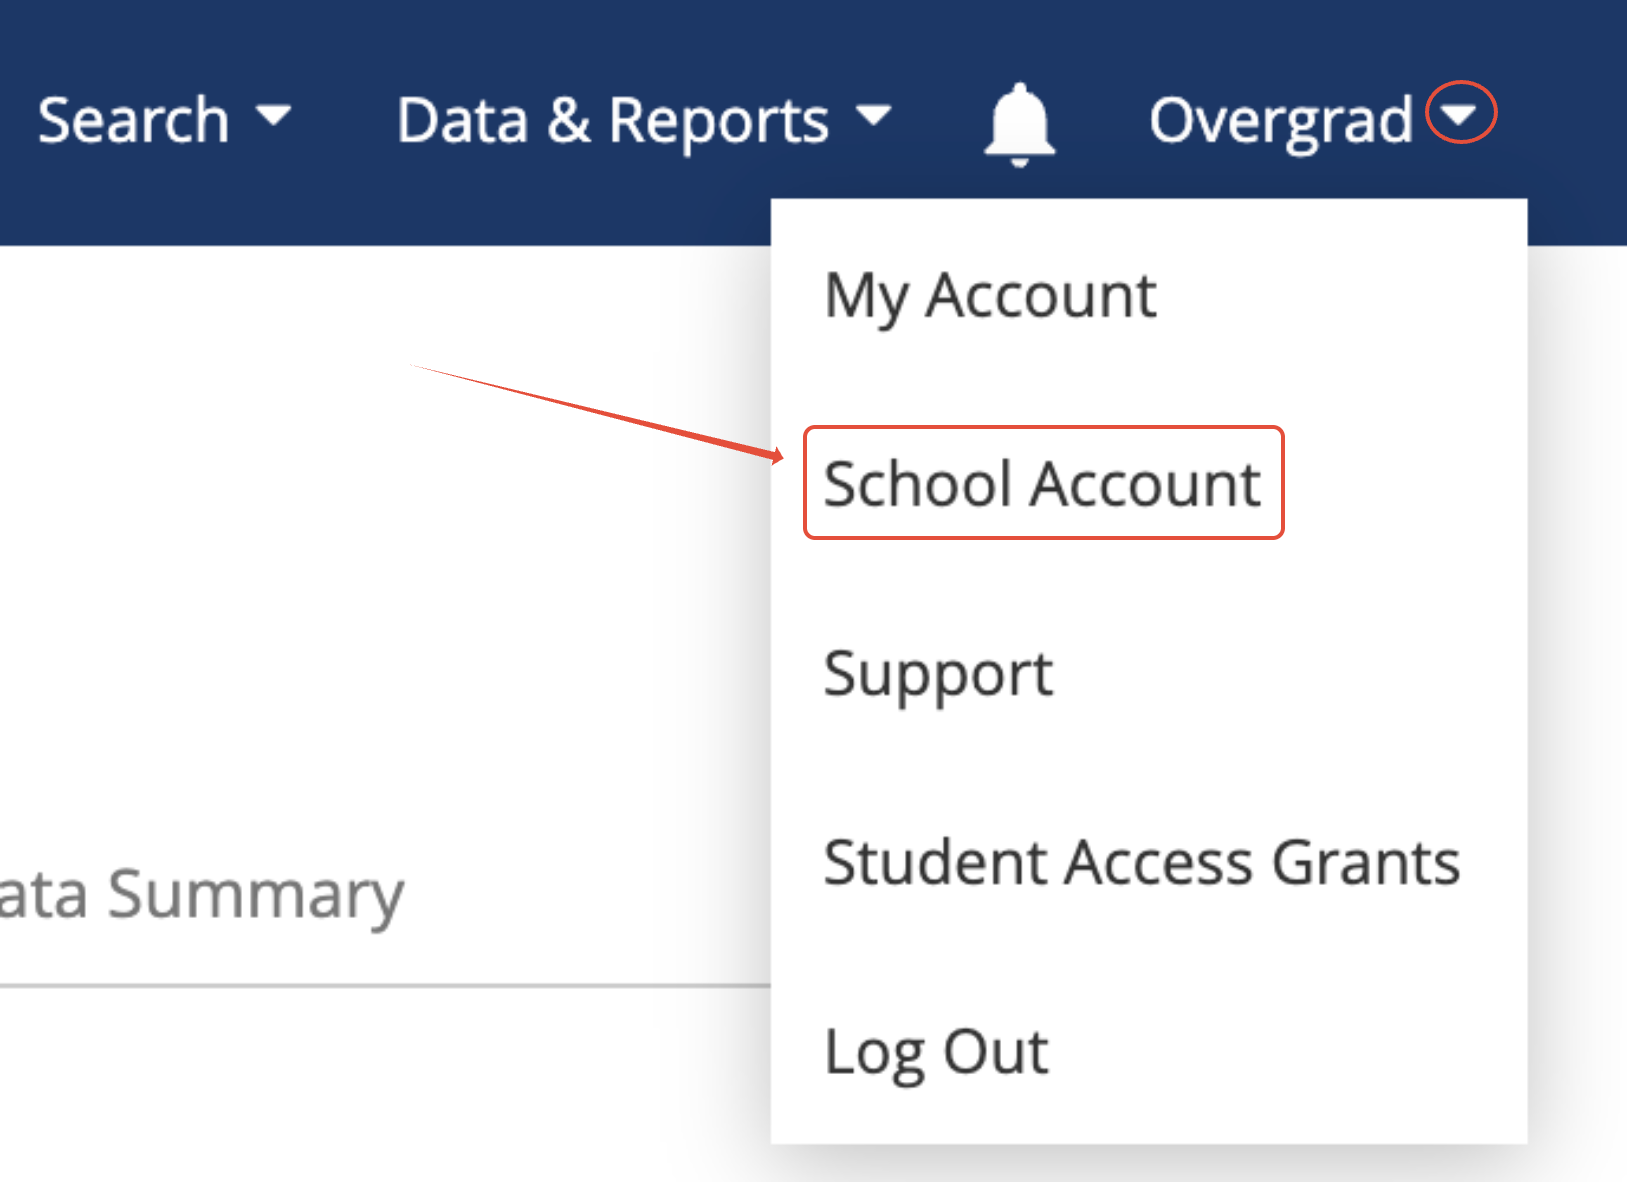
Not sure which version you have? Click your name in the top-right corner of Overgrad and click School Account.
If your Data Imports section looks like this, you're in the right place.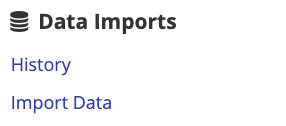 If it looks like this, use the Bulk Uploading Student Information (Classic Uploader) article instead.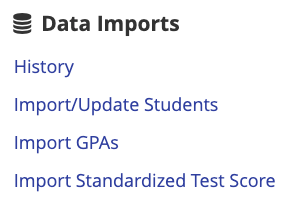
Only Account Managers can access the Bulk Uploader. A School Account Manager can only upload rows for students at their own school; a District Account Manager can upload rows for any school in the district.
Step 1: Open the Bulk Uploader and choose a category
From the top navigation, open your account menu and go to School Account.
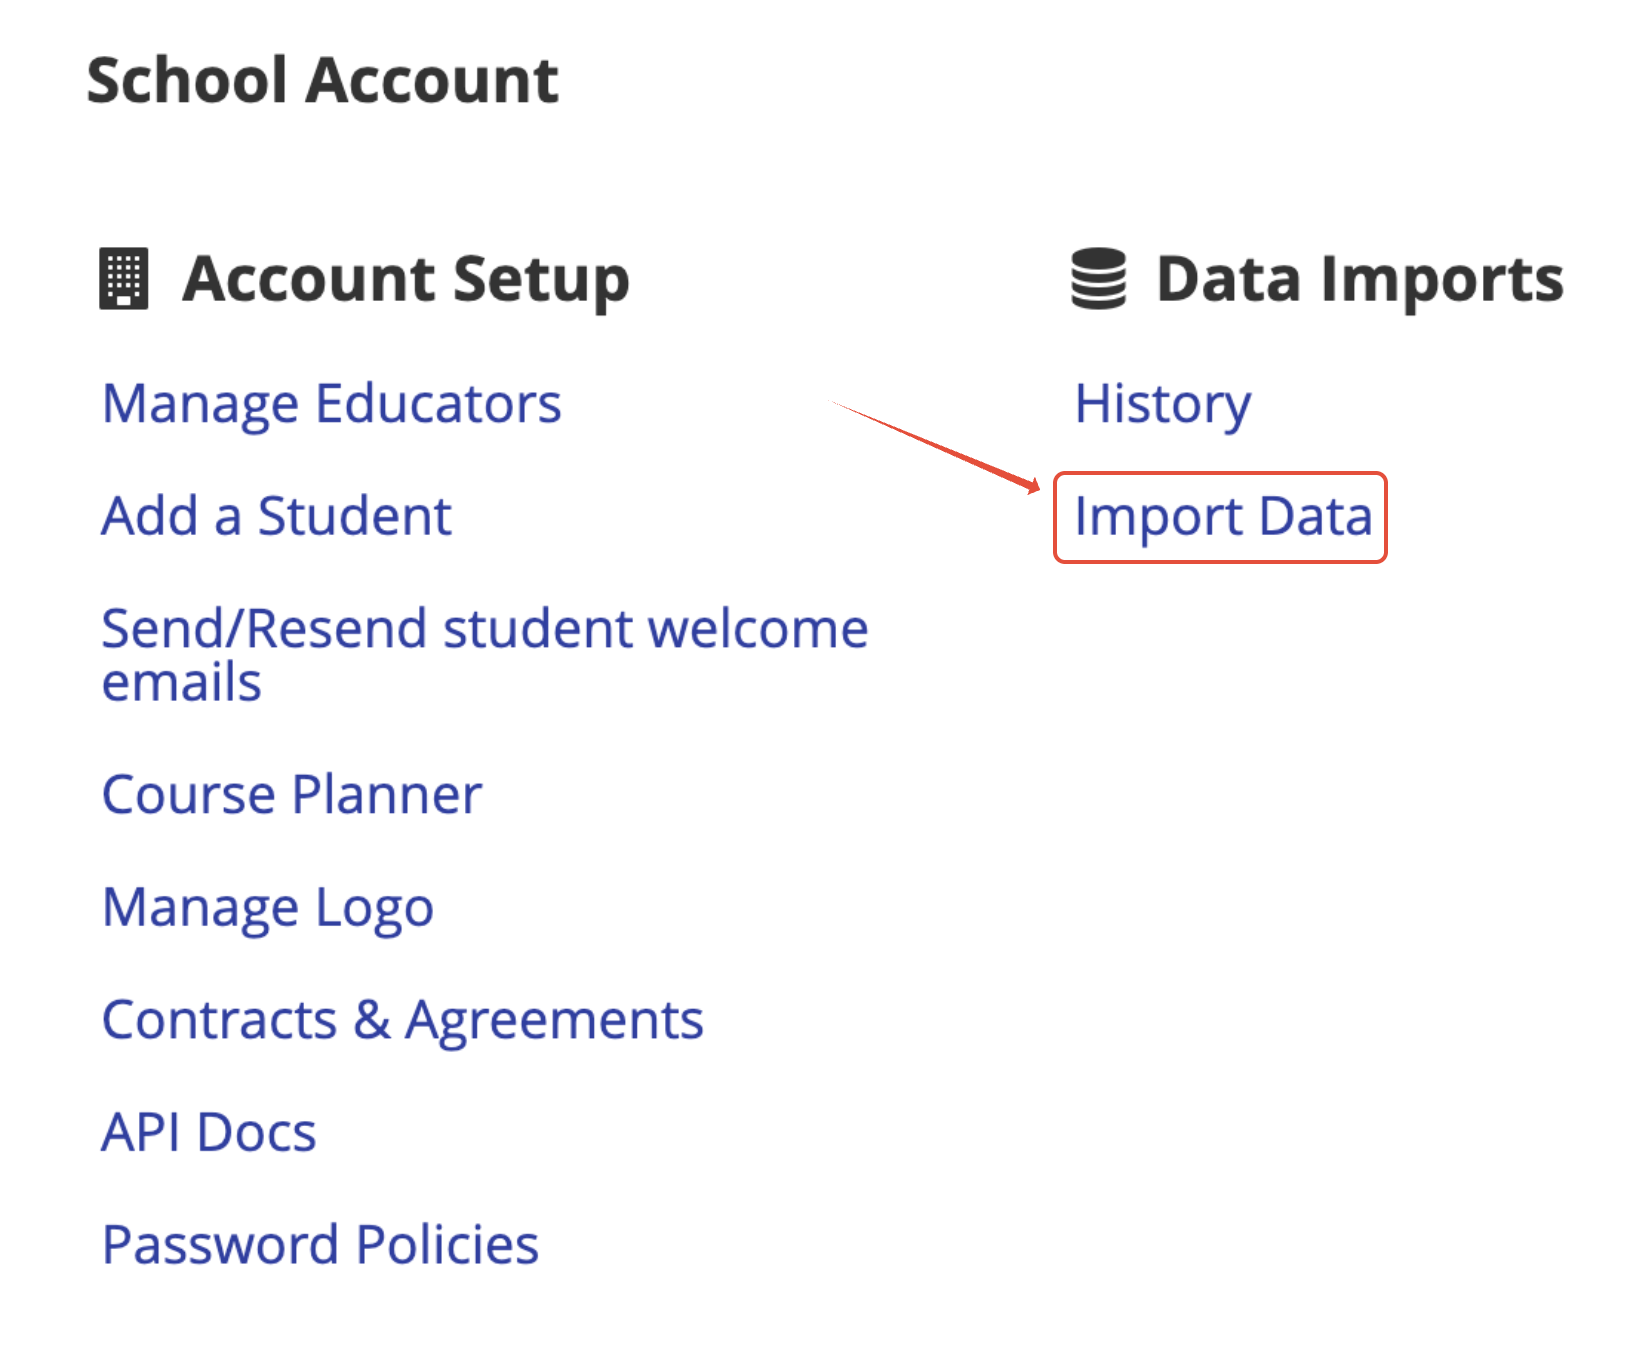
Under Data Imports, click Import Data.
Select Student Information to upload a roster, GPA, test scores, or contacts, or any combination of these in a single spreadsheet. If you don't have a file ready, use the template link on this screen; it's generated for your account and includes your school's custom fields.
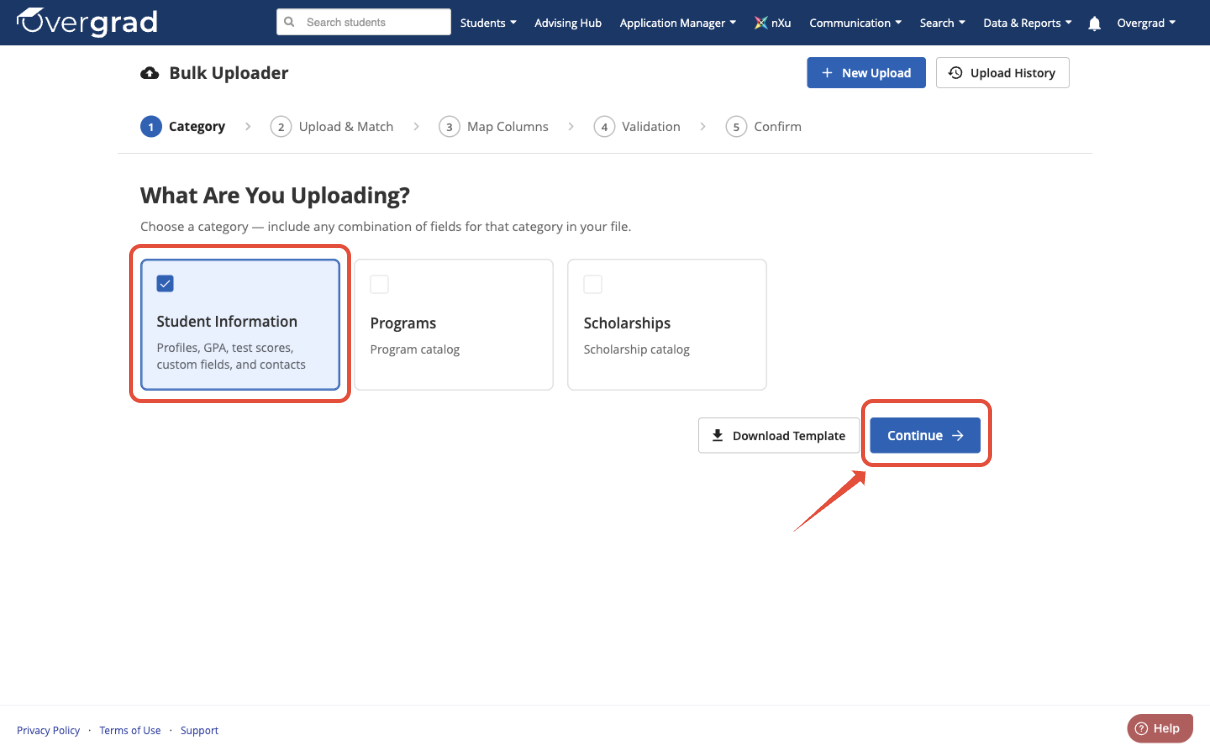
Click Continue.
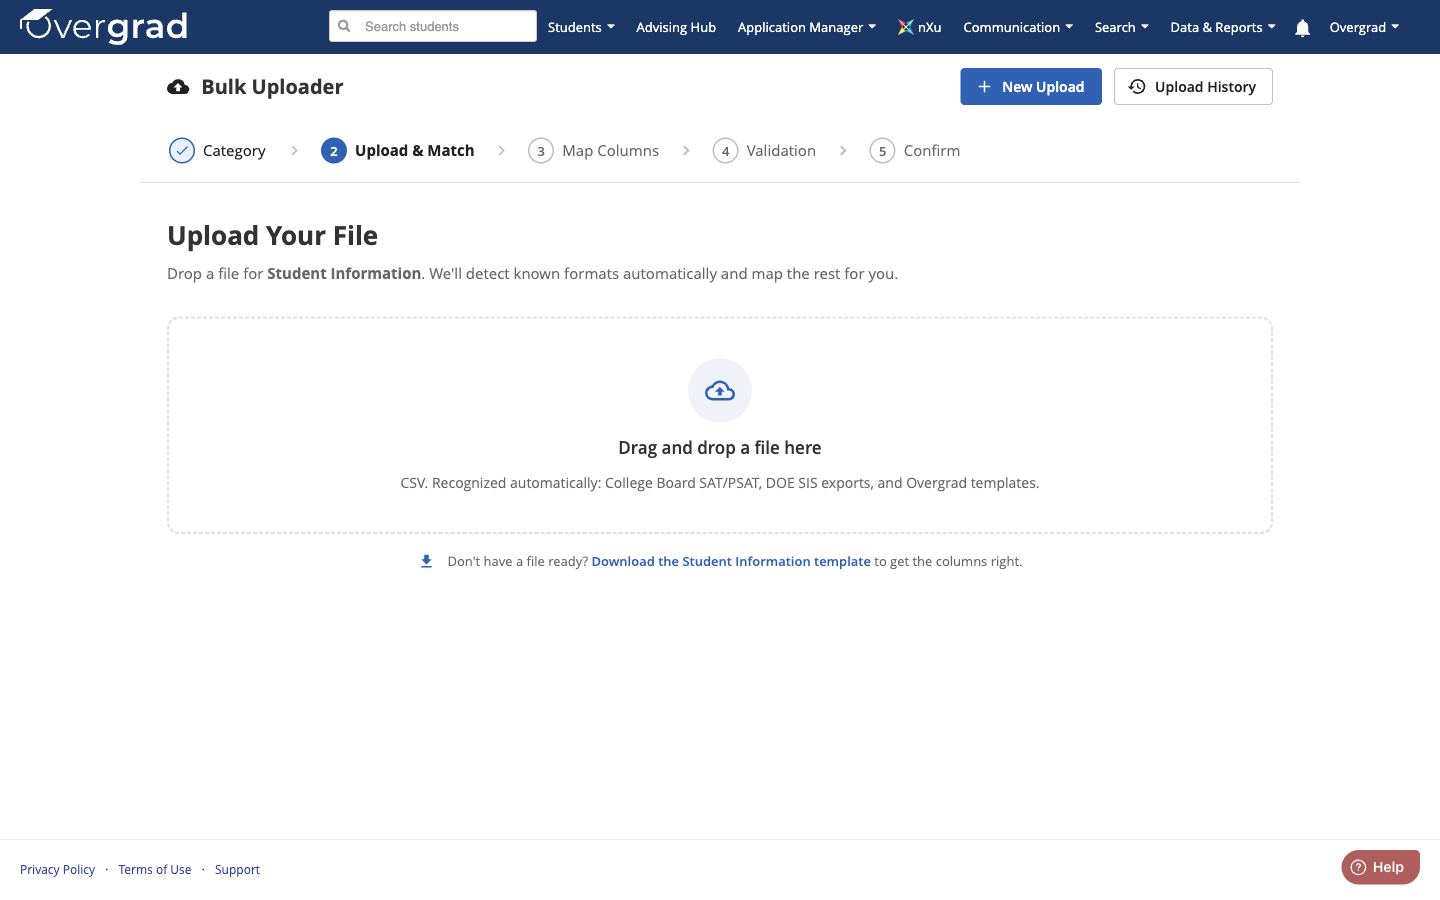
Step 2. Upload your file.
Drag and drop your CSV onto the upload area, or click it to browse for a file.
Step 3. Match what's in your spreadsheet to Overgrad's data fields.
Once your file finishes uploading, pick the identifier used to match each row to an existing student:
- Student ID — recommended
- First Name + Last Name + Date of Birth — for files with no ID column
- Email Address
- Secondary Student ID — a custom identifier, if your district uses one
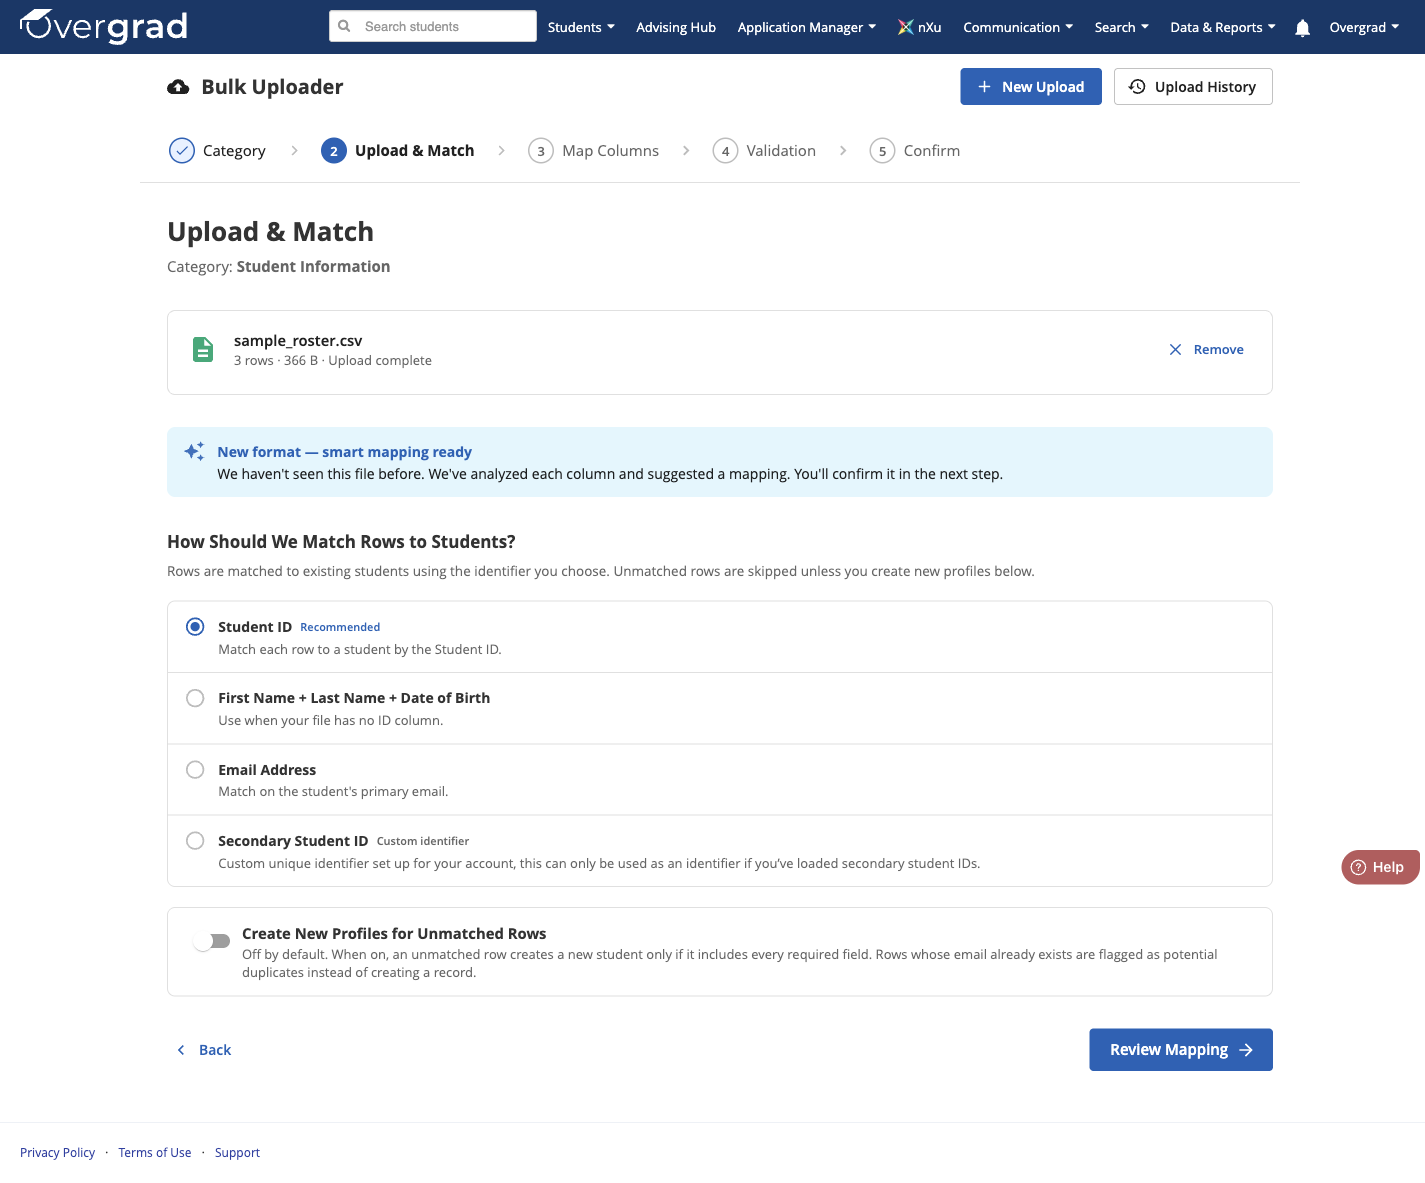
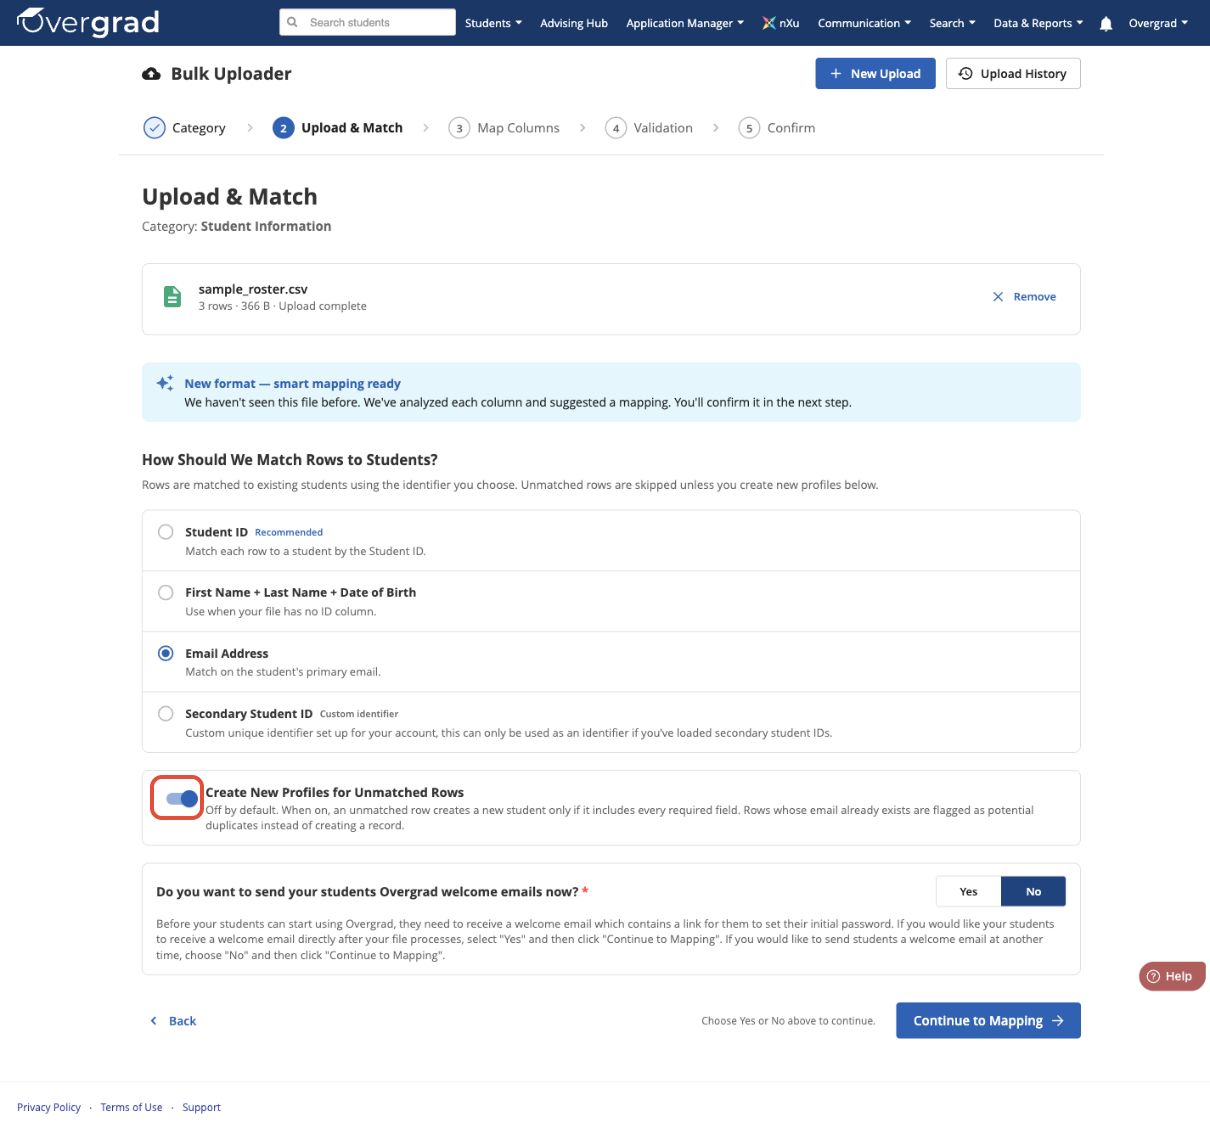
Rows that don't match an existing student are skipped by default. Turn on Create New Profiles for Unmatched Rows to have them create new accounts instead*
If you turn on new profile creation, you'll also choose whether to send welcome emails to newly created students right away, or send them later. *New profiles require email, first name, last name, birth date, graduation year, and high school on the row, or it's flagged during validation.
Step 4. Review column mapping.
Every column in your file is matched to an Overgrad field automatically. Each match carries a confidence label:
| Label | What it means |
|---|---|
| Strong match | We're confident — either your district has mapped this column the same way before, or the header and values clearly match a field. |
| Weak match | Reasonably confident, but your district has mapped this column differently in the past, or the match is less certain. Worth a glance. |
| Needs review | We couldn't confidently suggest a field — map this one yourself. |
| Skipped | This column won't be imported. |
Use the filter chips above the table to jump straight to columns that need attention, ignoring strong matches because they pre-accepted and don't require any action.
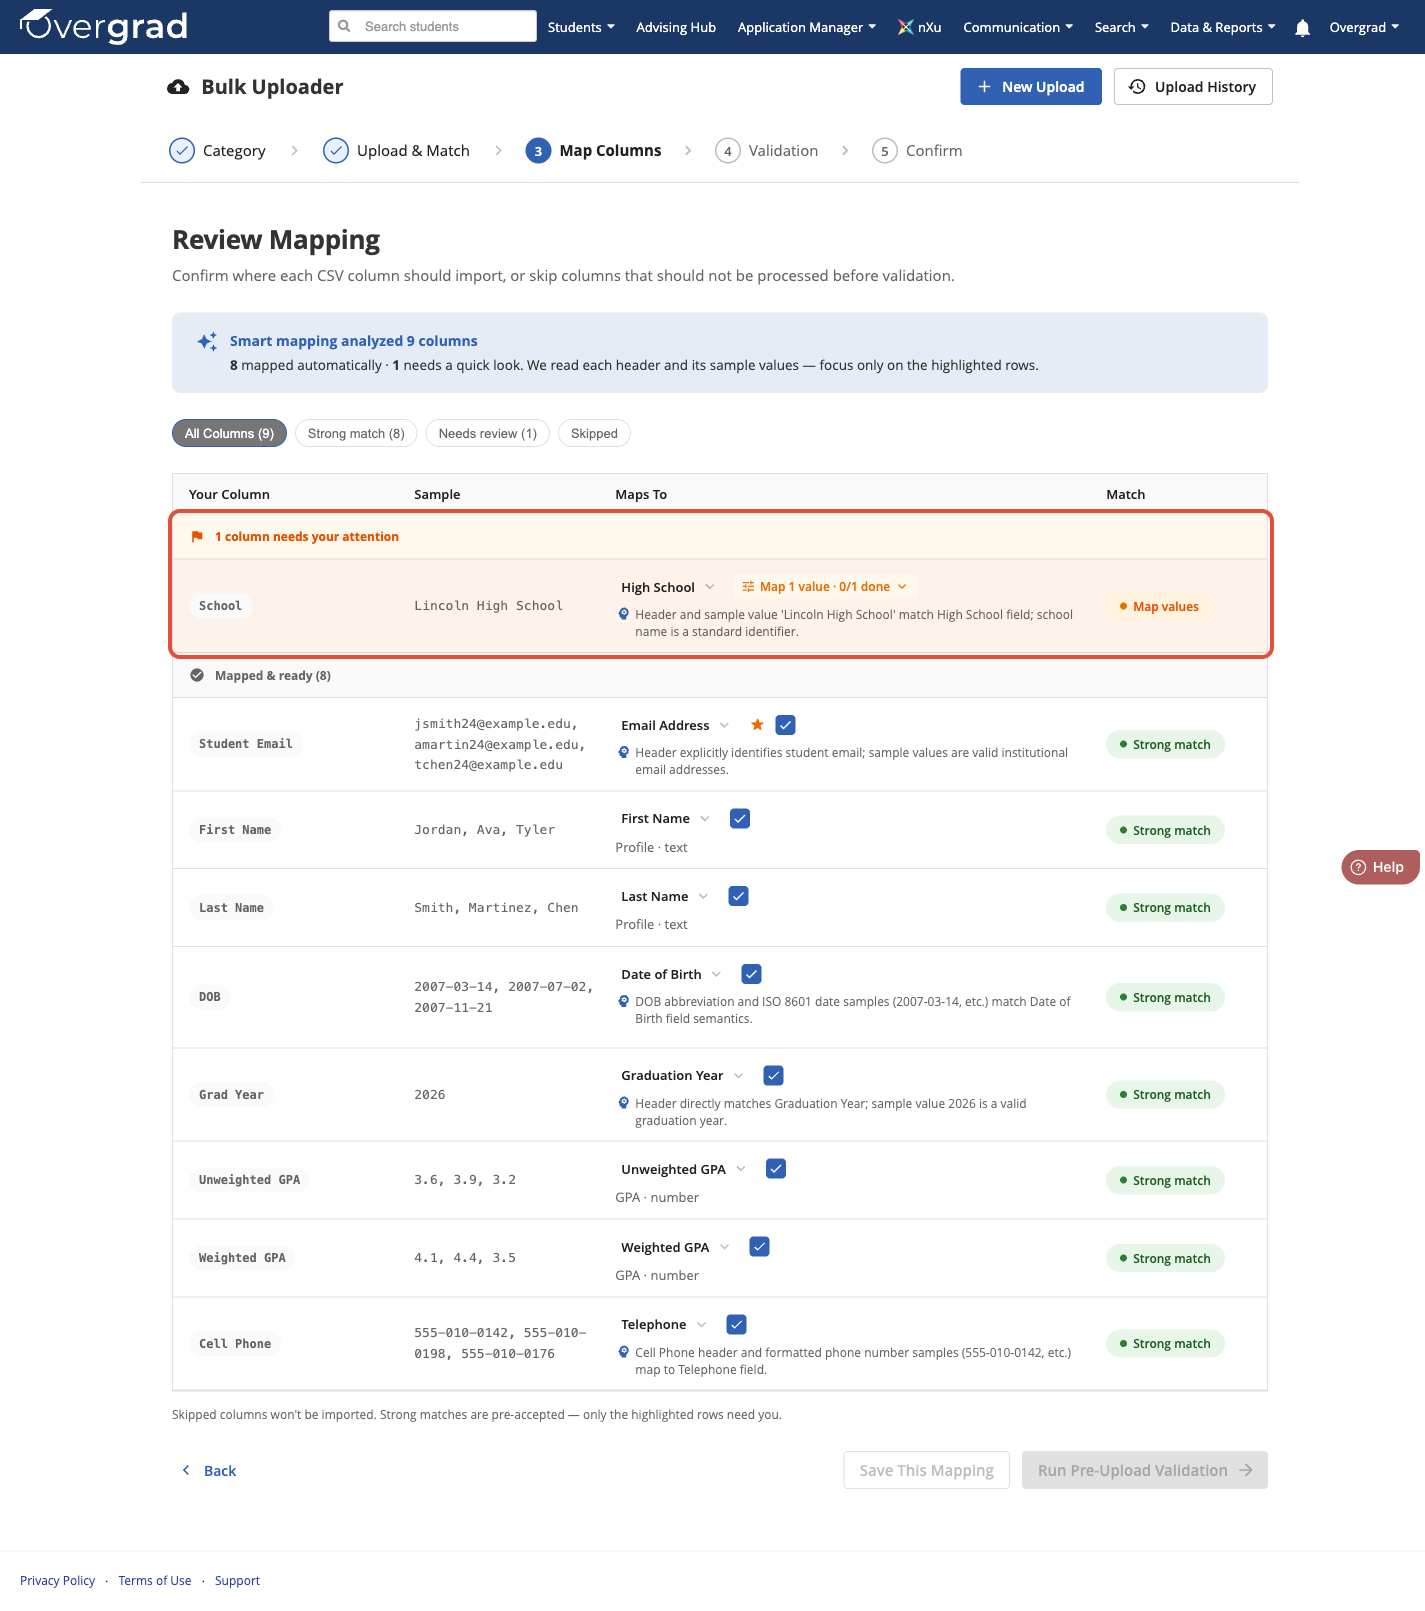
Some fields, like High School, map the column automatically but still need each distinct value matched to the corresponding Overgrad option. Click Map values to open the value-mapping panel.
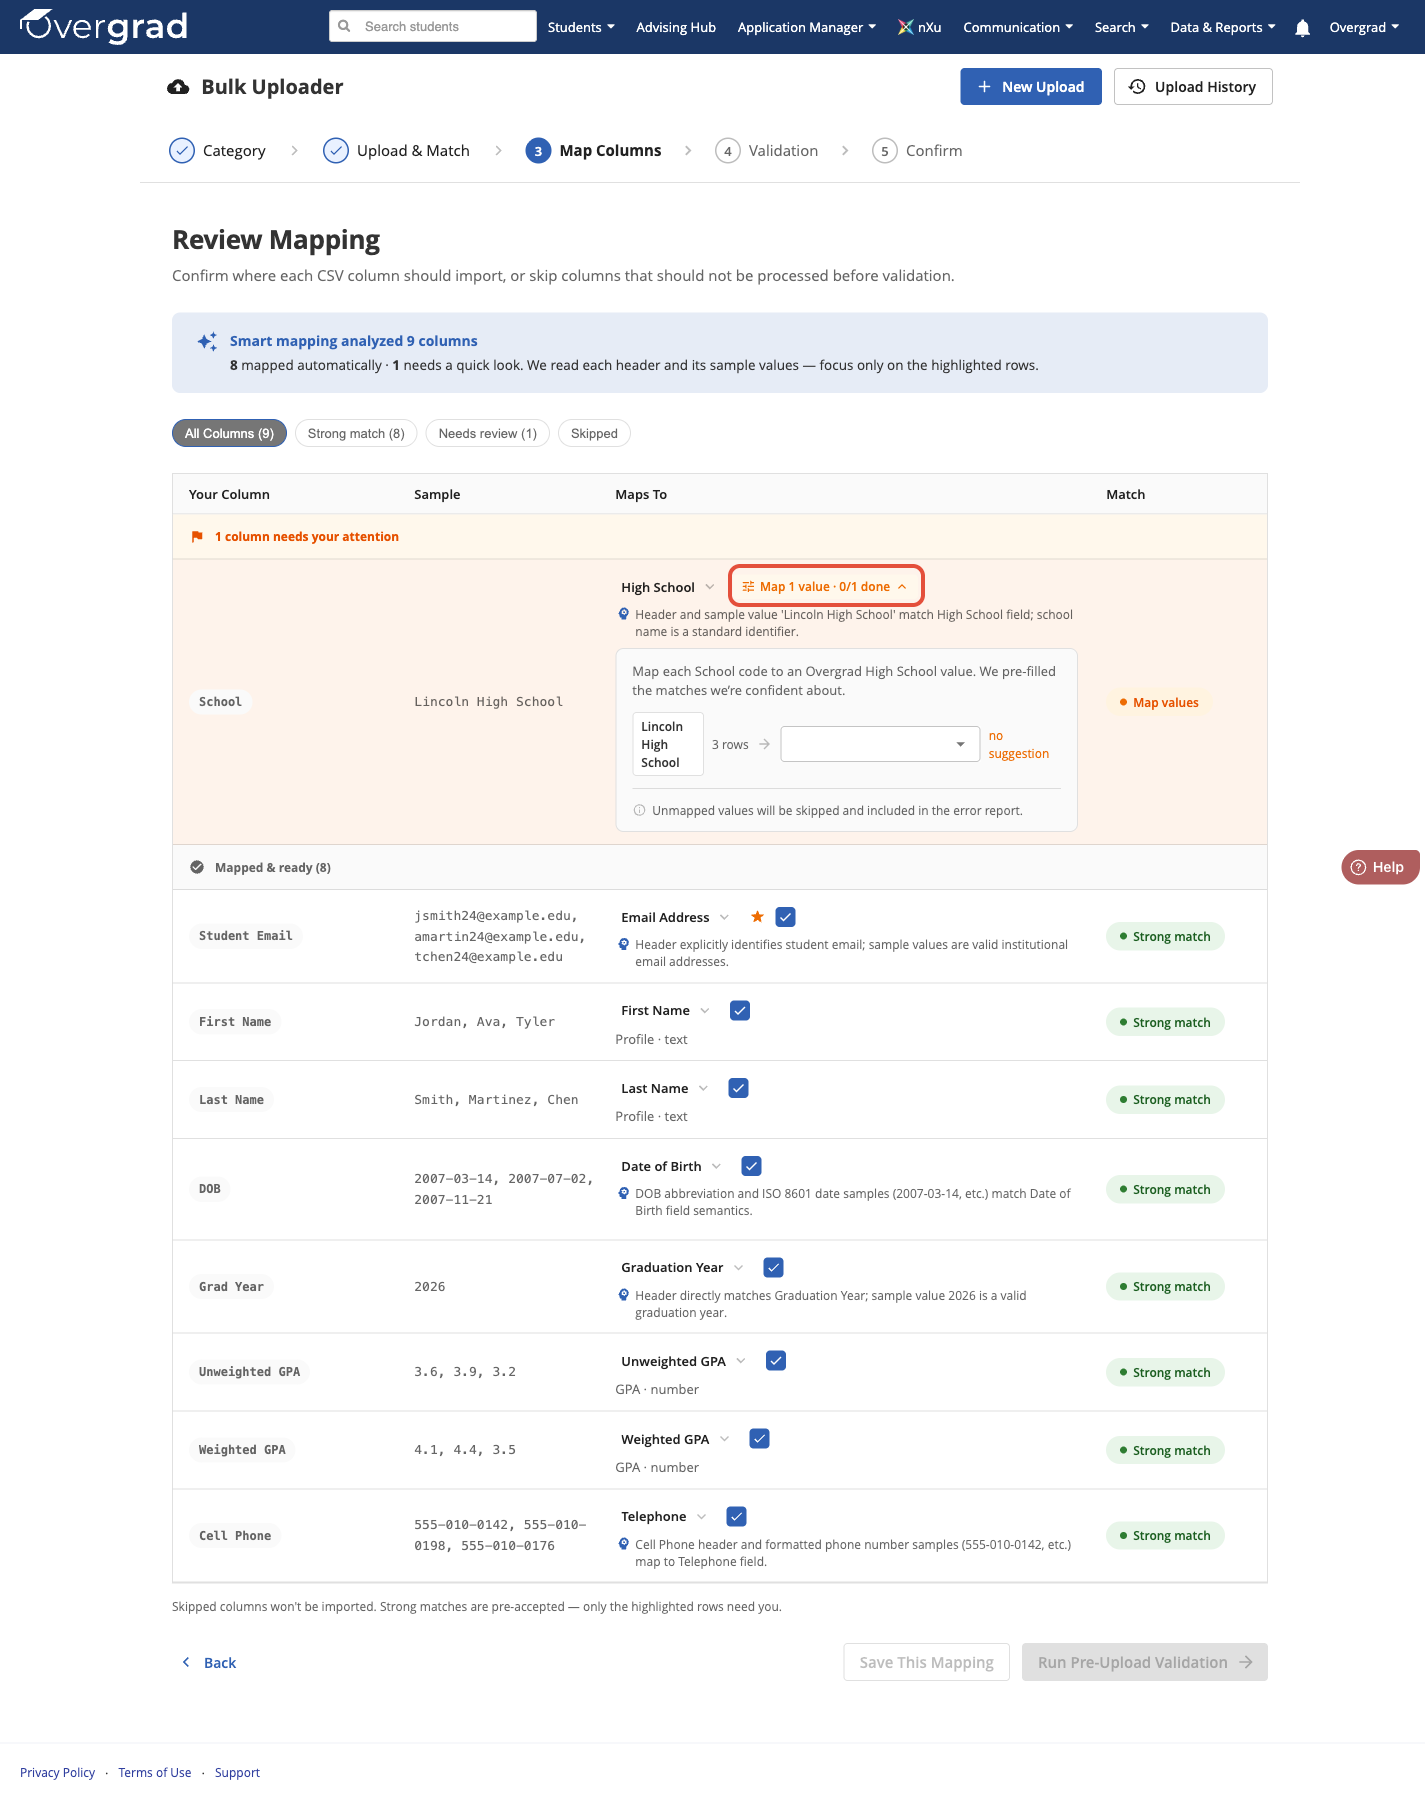
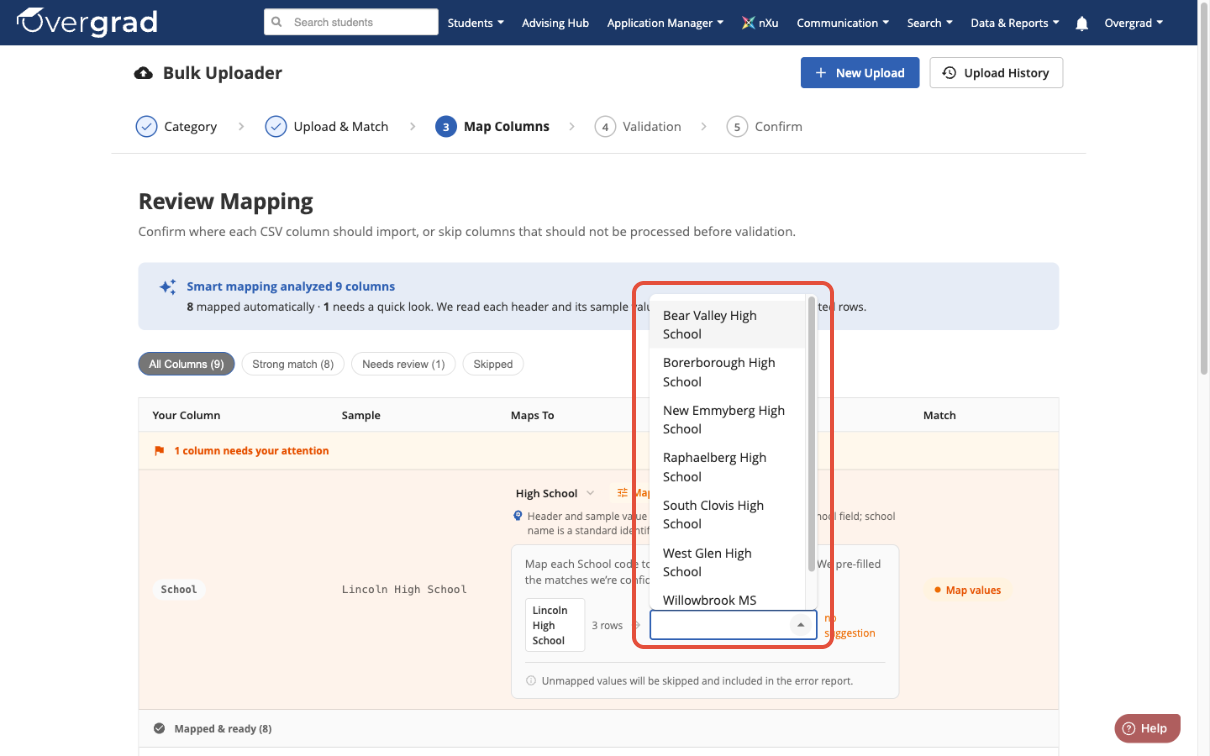
You'll match values using the dropdown menu associated with that field
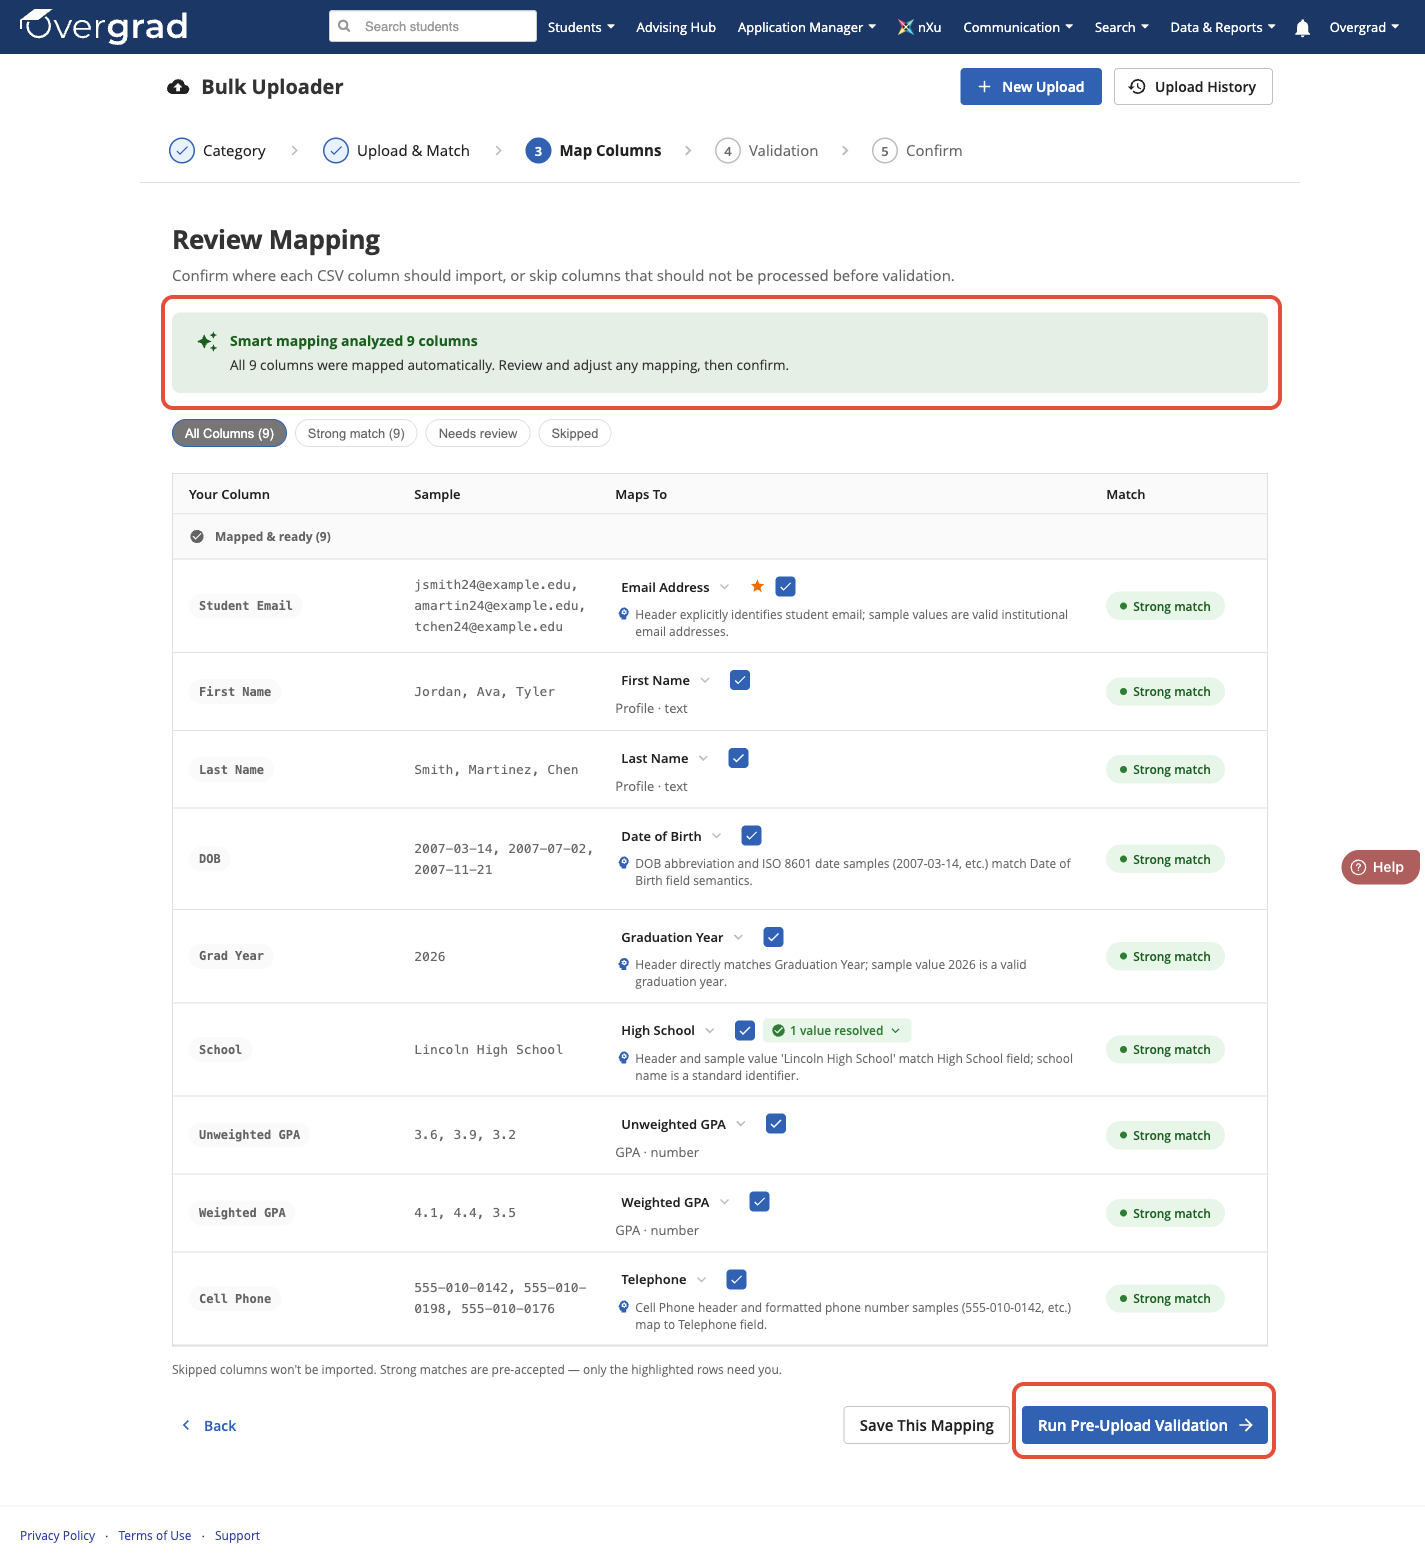
Once every column is confirmed, all of them are marked mapped and ready.
Mappings are saved at the district level automatically. The next time anyone at your district uploads a file with similar columns, Overgrad reuses these mappings so that you don't need to re-map from scratch.
Once you see that all columns are mapped correctly, click Run Pre-Upload Validation.
Step 5. Review validation
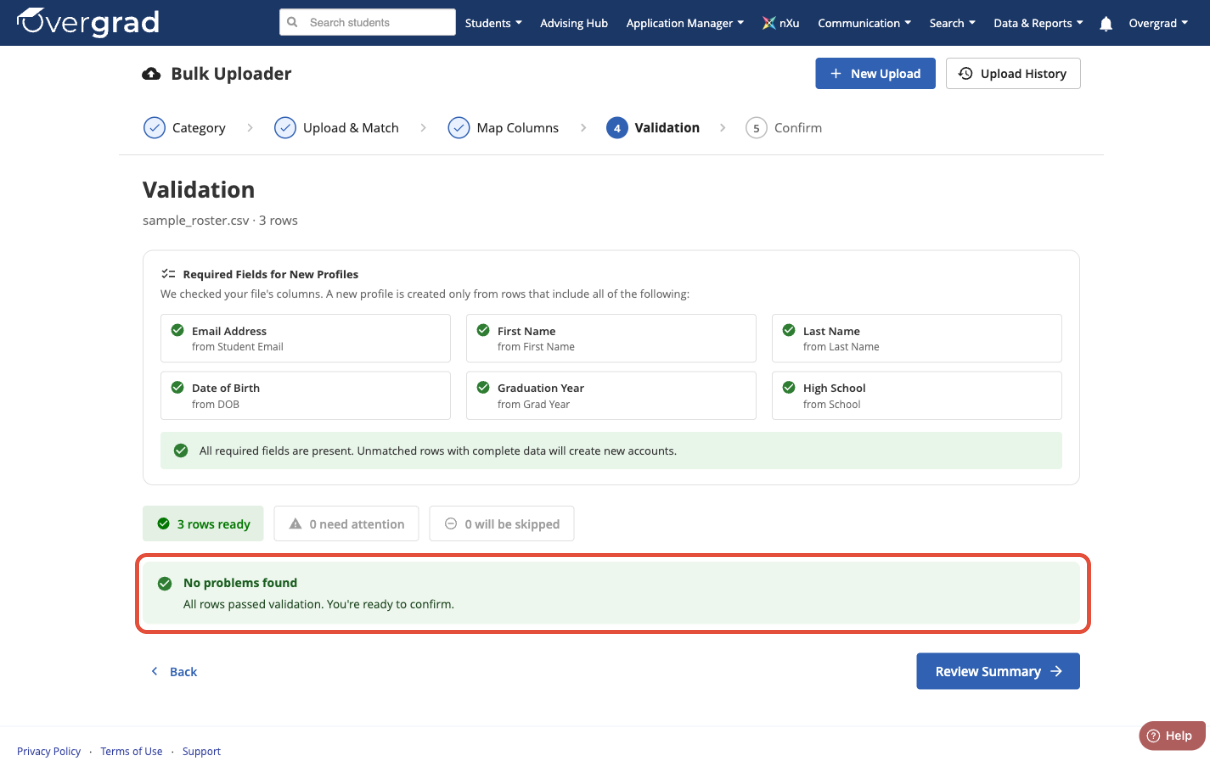
If every row passes, you'll see a clean summary and can move straight to confirming the upload.
If some rows have issues, they're grouped by problem type with a plain-language explanation and a row count per group.
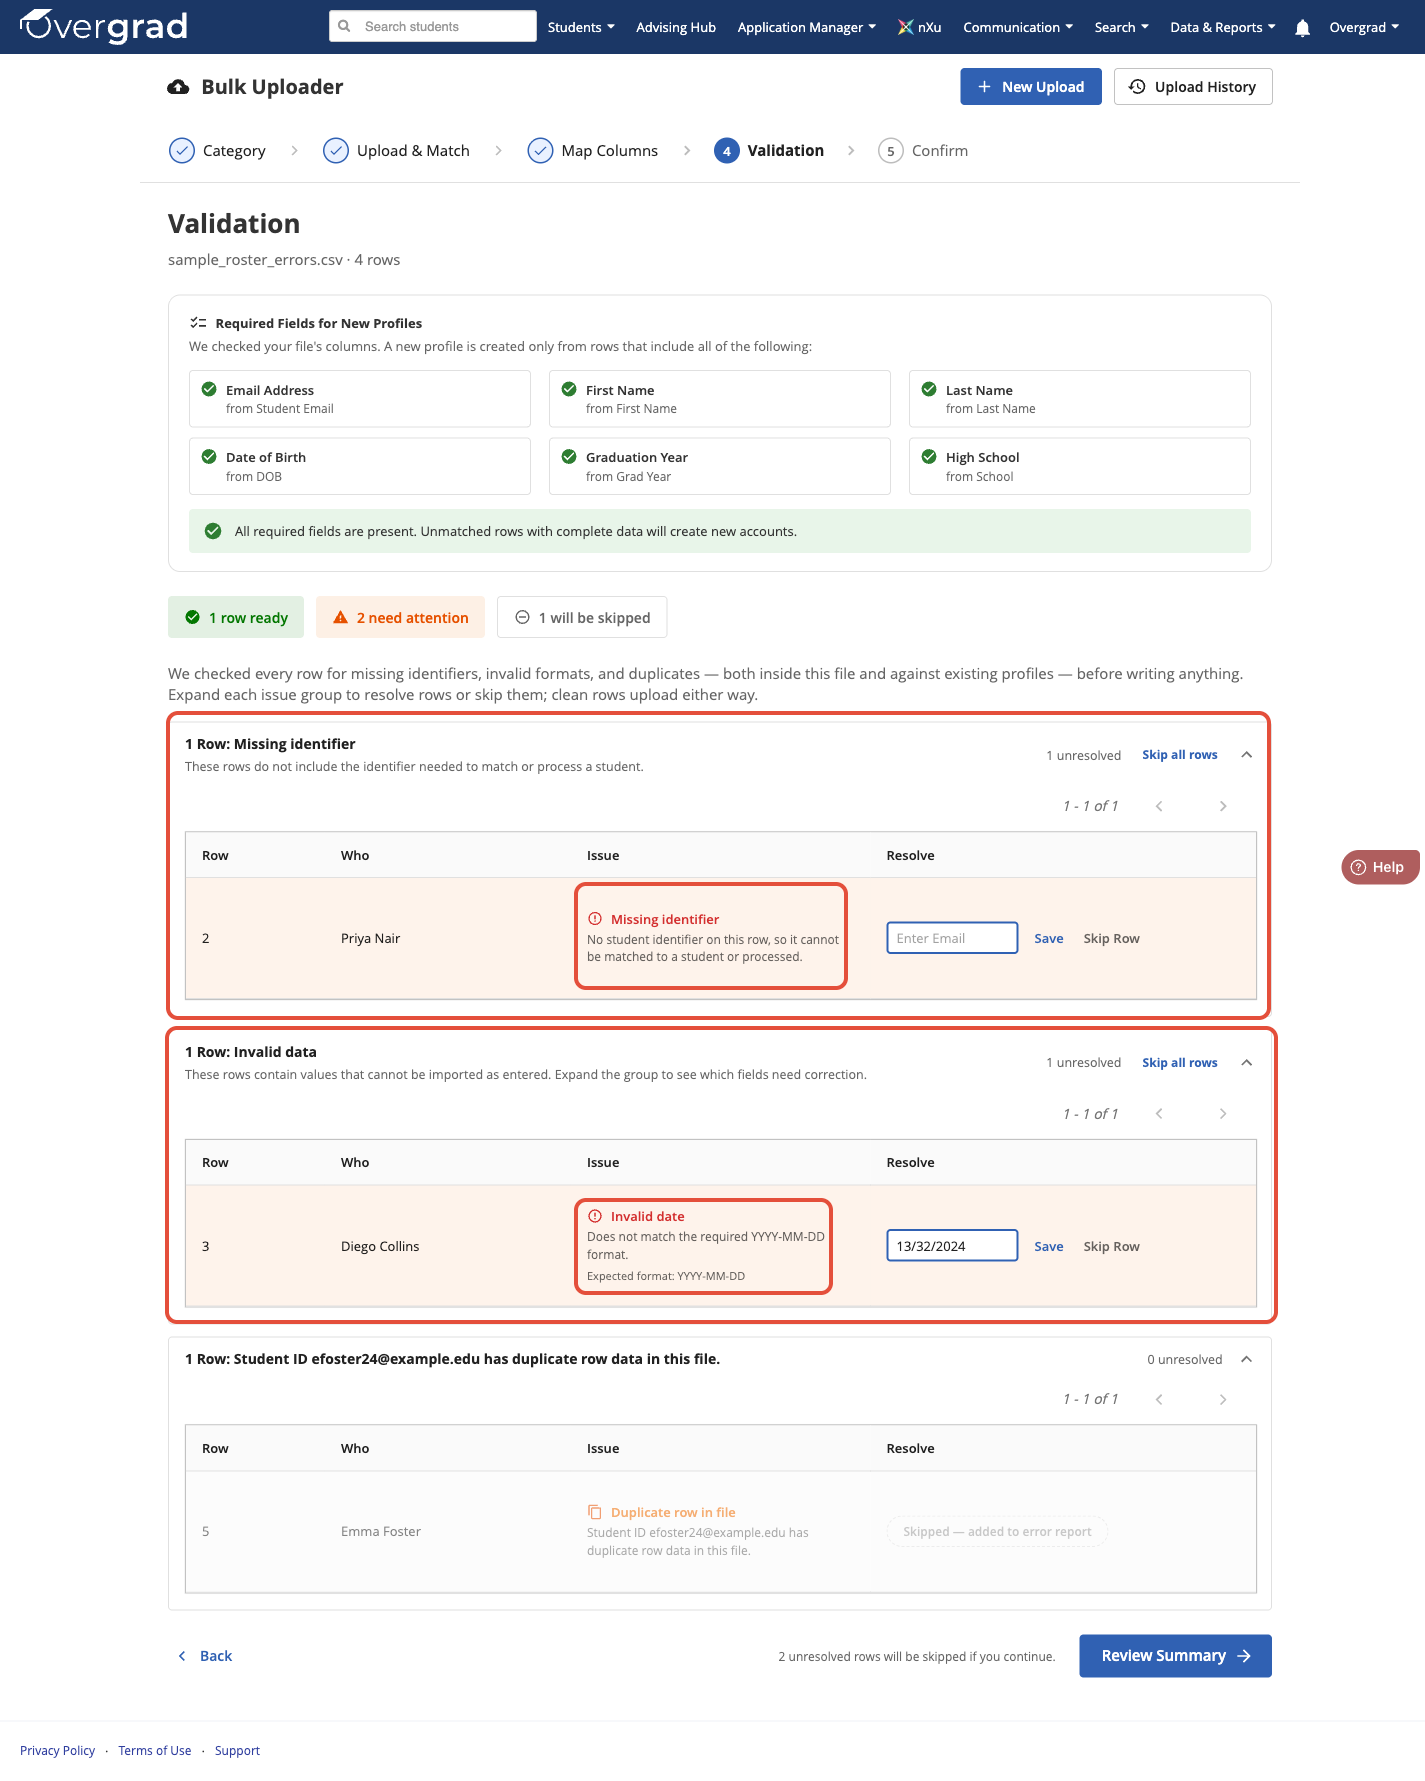
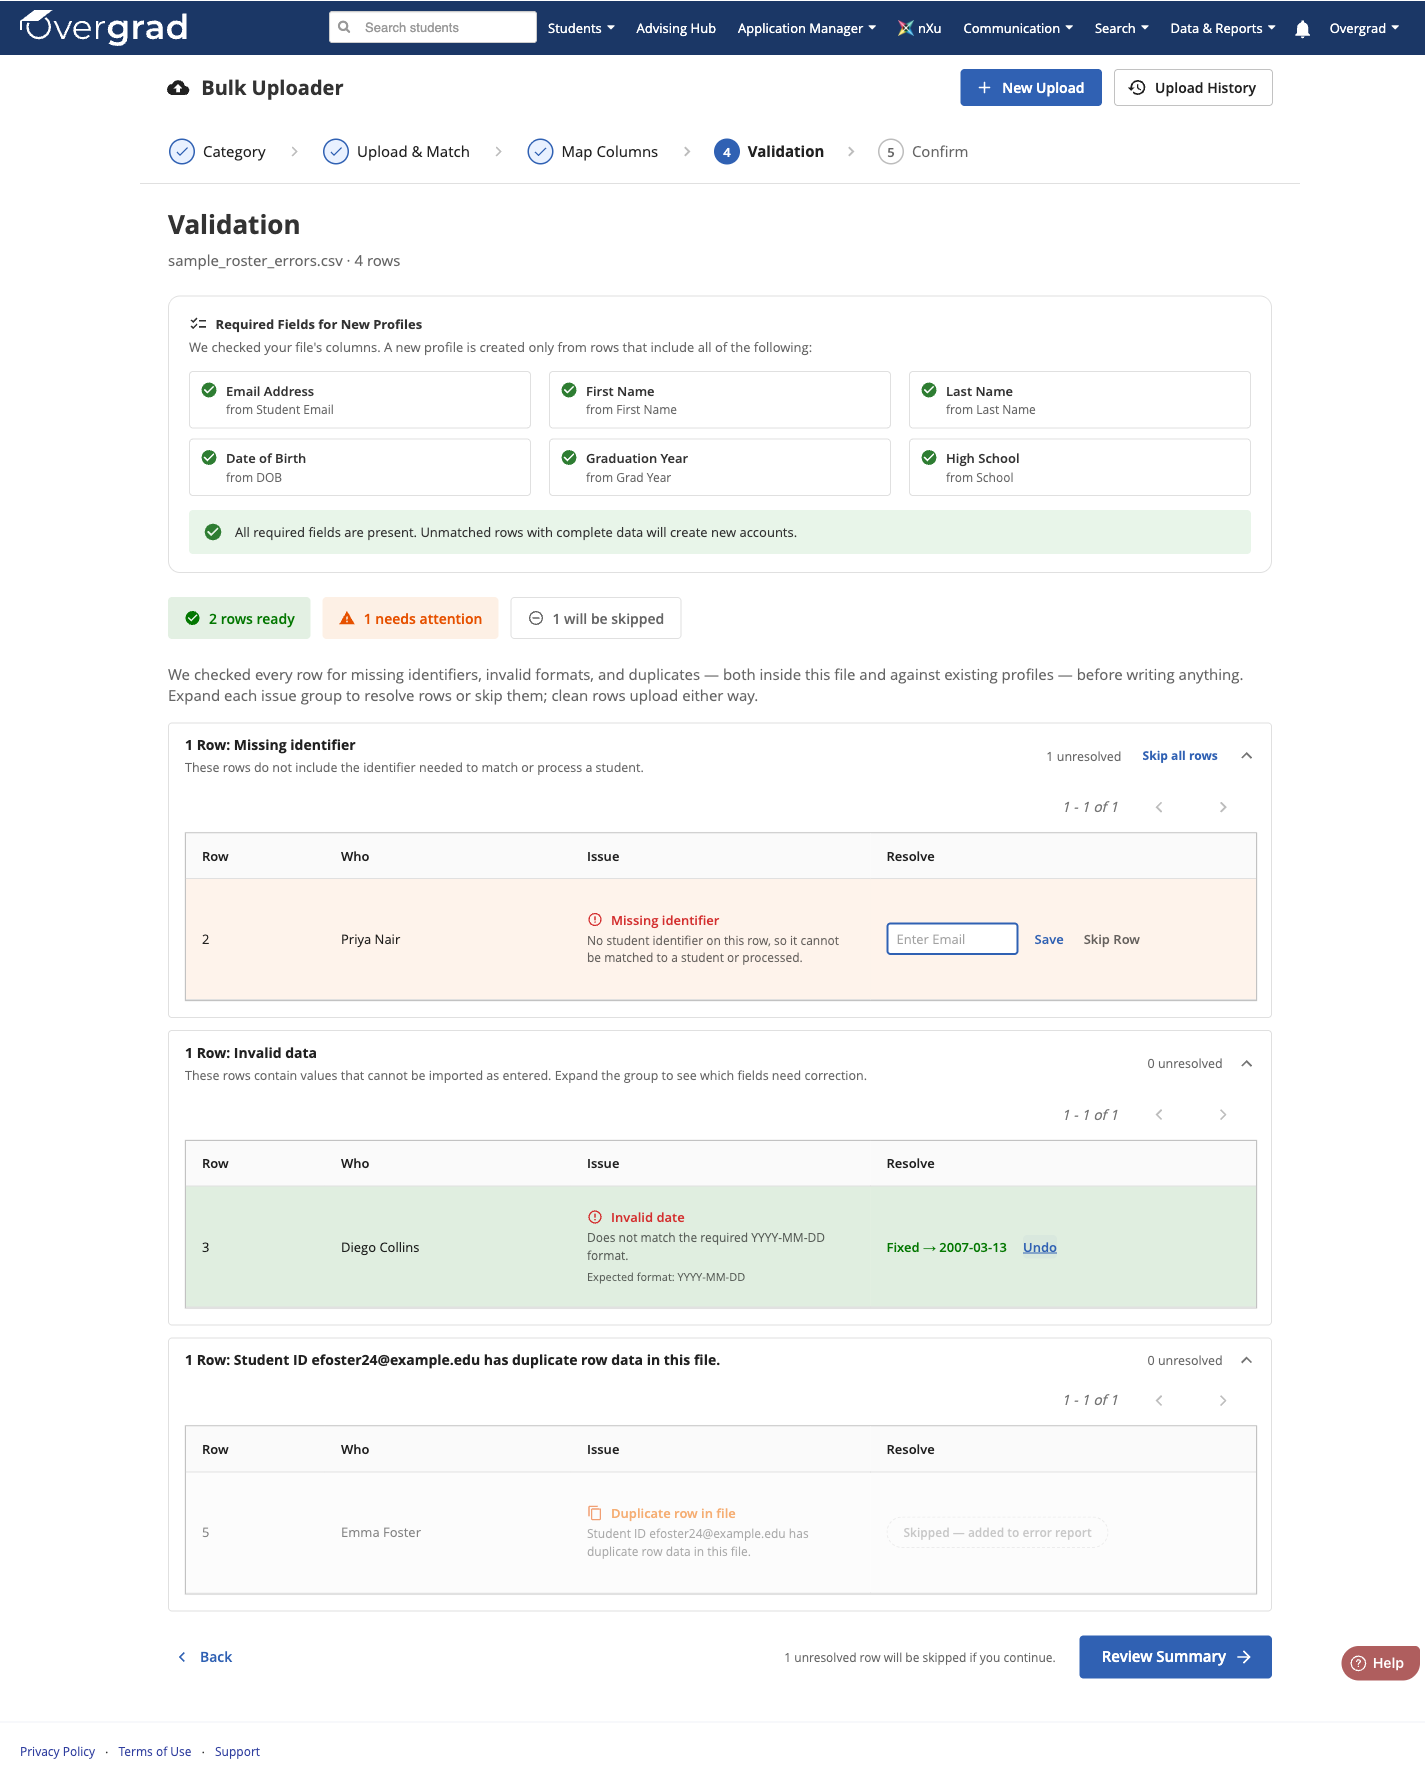
Click into a group to see the affected rows. You can:
- Edit the row inline — fix the value directly in the table. The row re-validates on its own rather than re-running validation for the whole file.
- Skip the row — it's excluded from this upload and added to the error report.
Once you've addressed or skipped each issue, click Review Summary.
Rows you don't resolve are skipped when you continue and every skipped row is included in the downloadable error report with a specific reason.
Step 6. Confirm and submit the upload
The final step summarizes exactly what will happen depending on the data included in your file: what will be created or updated, and how many rows will be skipped.
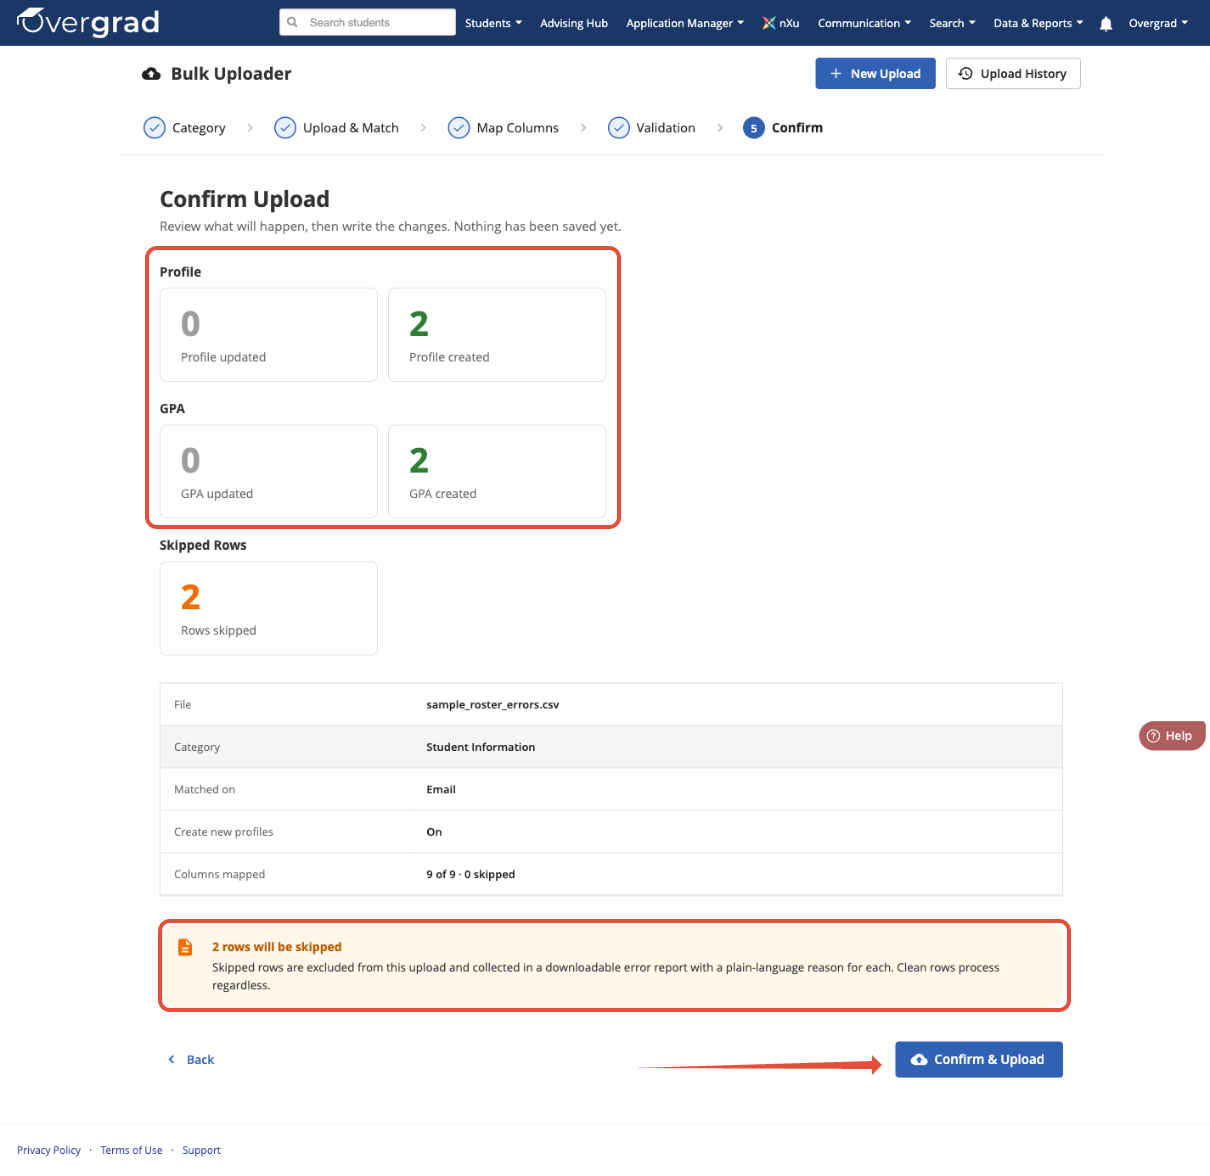
Click Confirm & Upload to start processing your file. Overgrad will send a completion email when your file is processed, including row counts and a link to download the error report if any rows were skipped.
You can't start a new upload for the same category while another file is still processing. Wait for the current upload to finish before starting the next one.
Error report files are available for download for 30 days after the upload.
Was this article helpful?
That’s Great!
Thank you for your feedback
Sorry! We couldn't be helpful
Thank you for your feedback
Feedback sent
We appreciate your effort and will try to fix the article