Overview
This article is for students who want to upload Documents to their Document Locker in Overgrad. It covers how to add a document, what file types are accepted, how to upload a revision to an existing Document, and how to download or access Documents you've already added.
TABLE OF CONTENTS
Adding a Document
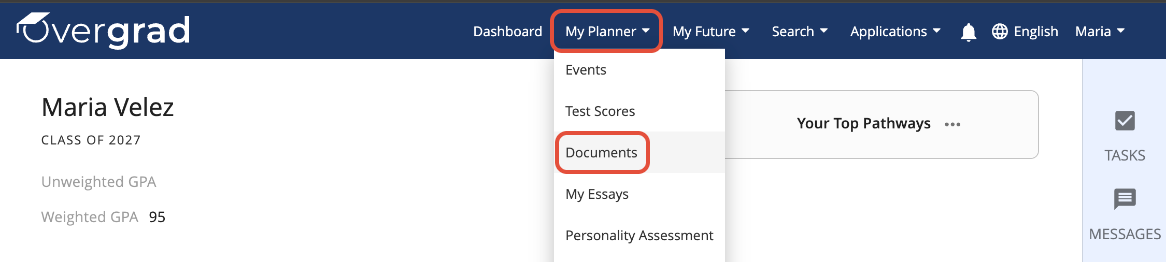
- Log into your Overgrad account. In the header, open the dropdown under My Planner and select Documents.
- Click + Add Document, then select the Document Type you would like to upload (Essays and Writing Samples, Unofficial Transcript, etc.) from the dropdown.
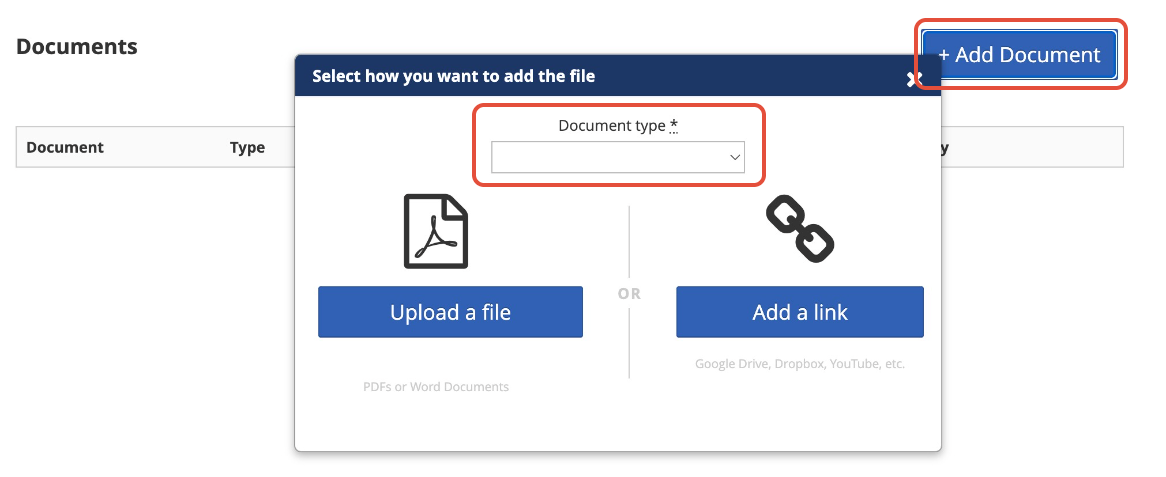
- Choose how you'd like to add your document. You have two options:
- Upload a file — Select a PDF or Word document from your computer. Files must be less than 3MB.
- Add a link — Enter a name for the link and a valid URL (for example, a Google Drive link). A green checkmark will appear next to the URL once it's confirmed as valid.
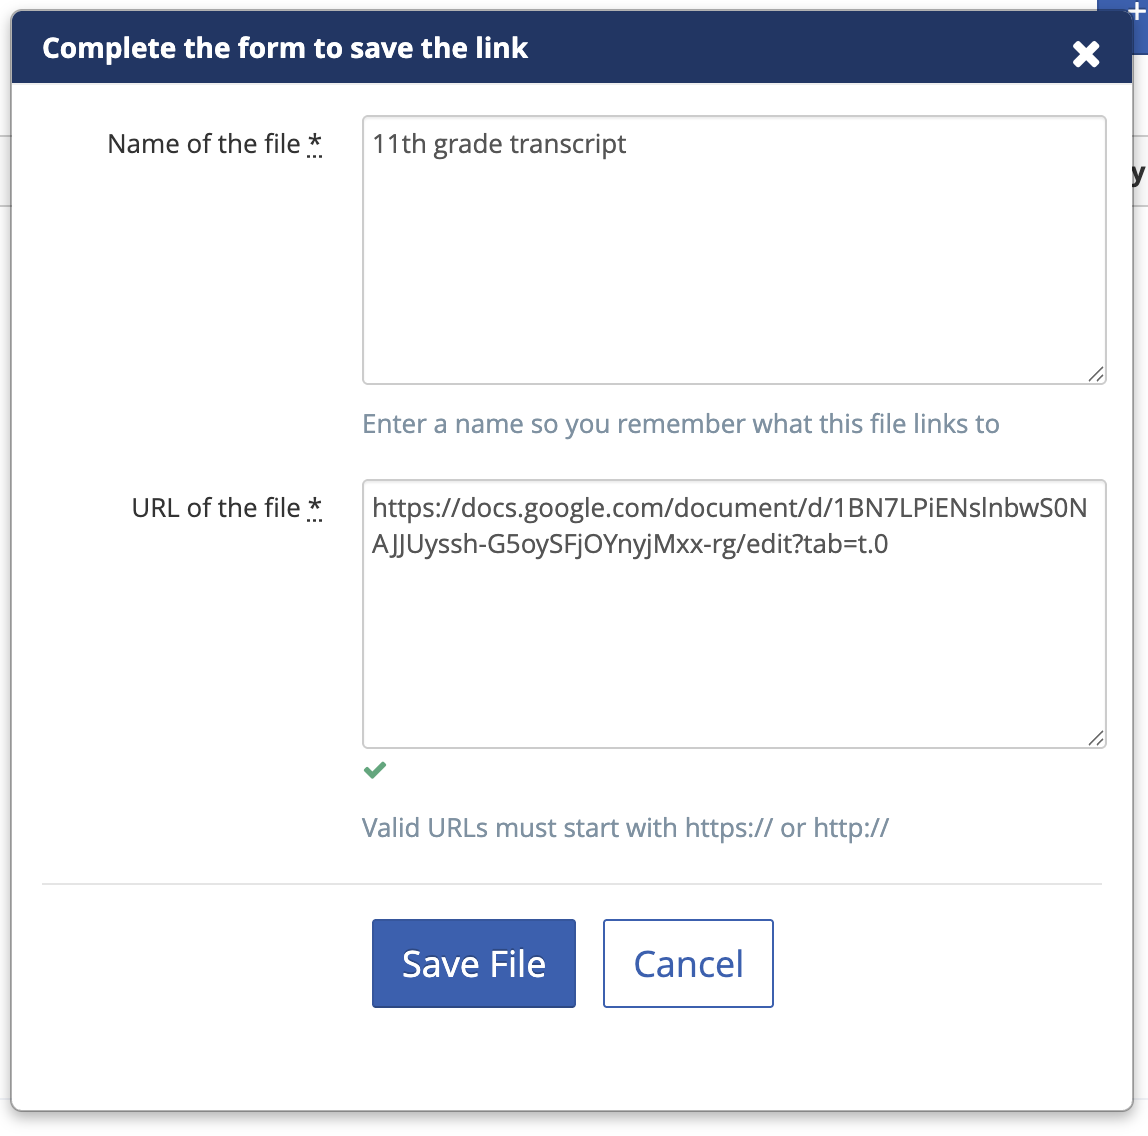
Note: Any Documents you add to your Document Locker will be visible to your counselor.
Uploading a Revision
To replace a Document with an updated version, click the three dots (...) to the right of the Document name and select Upload Revision.
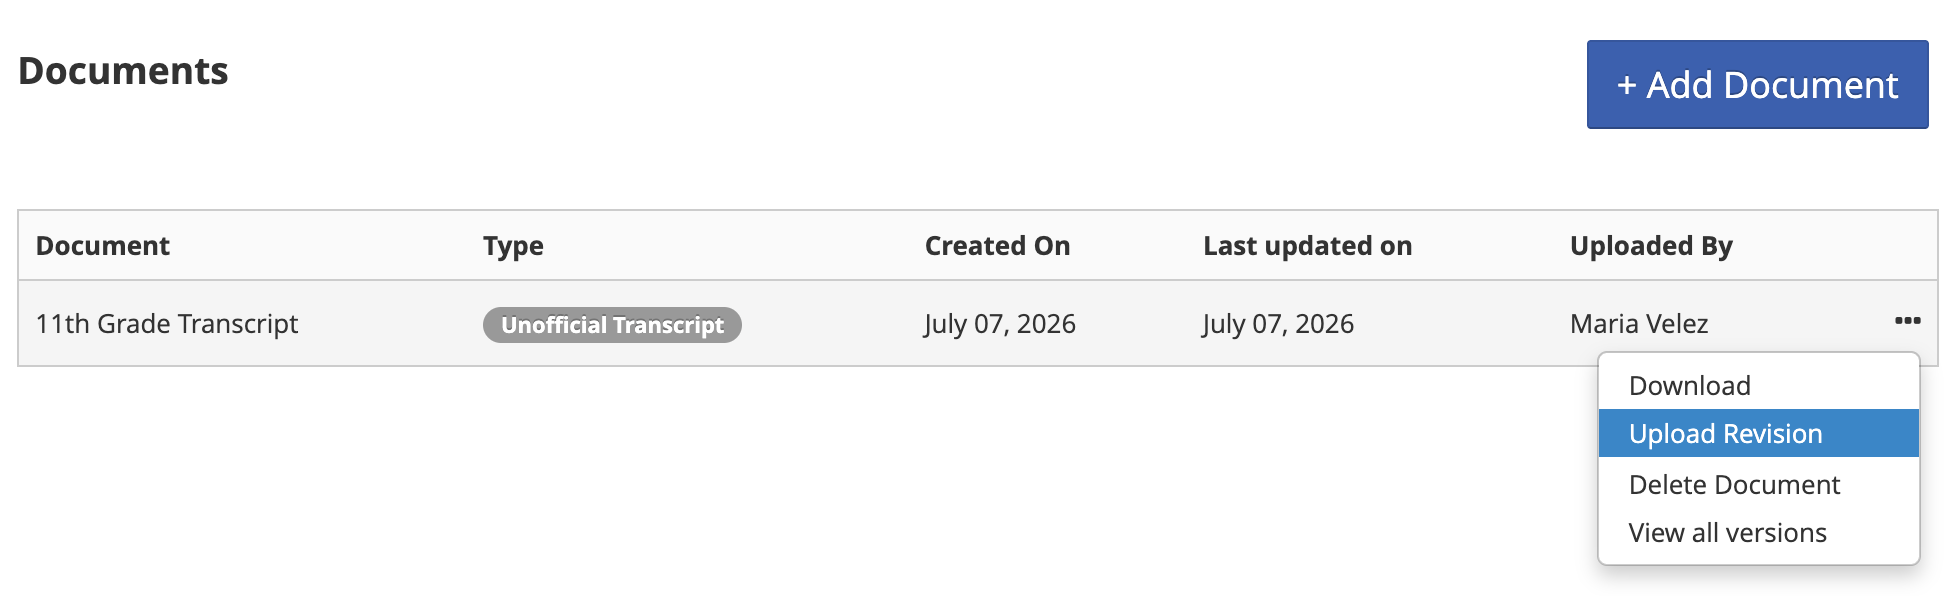
Note: If you uploaded a file from your computer, the revised file must have the same file name as the original. If the file name is different, Overgrad will create a new Document instead of replacing the existing one.
If you need to delete a Document entirely, select Delete Document.
Downloading or Accessing Your Documents
To access a Document, click the three dots (...) to the right of any Document name and select Download.
- If you uploaded a file, clicking Download will download the file to your computer.
- If you added a link, clicking Download will open the URL you added.
Was this article helpful?
That’s Great!
Thank you for your feedback
Sorry! We couldn't be helpful
Thank you for your feedback
Feedback sent
We appreciate your effort and will try to fix the article