This feature is only available to Overgrad Pro customers. Please connect with an Overgrad rep if you are interested in learning more.
Uploading Documents
1. Select "Caseload Overview" or "Applications" under Applications Manager on your Overgrad dashboard.
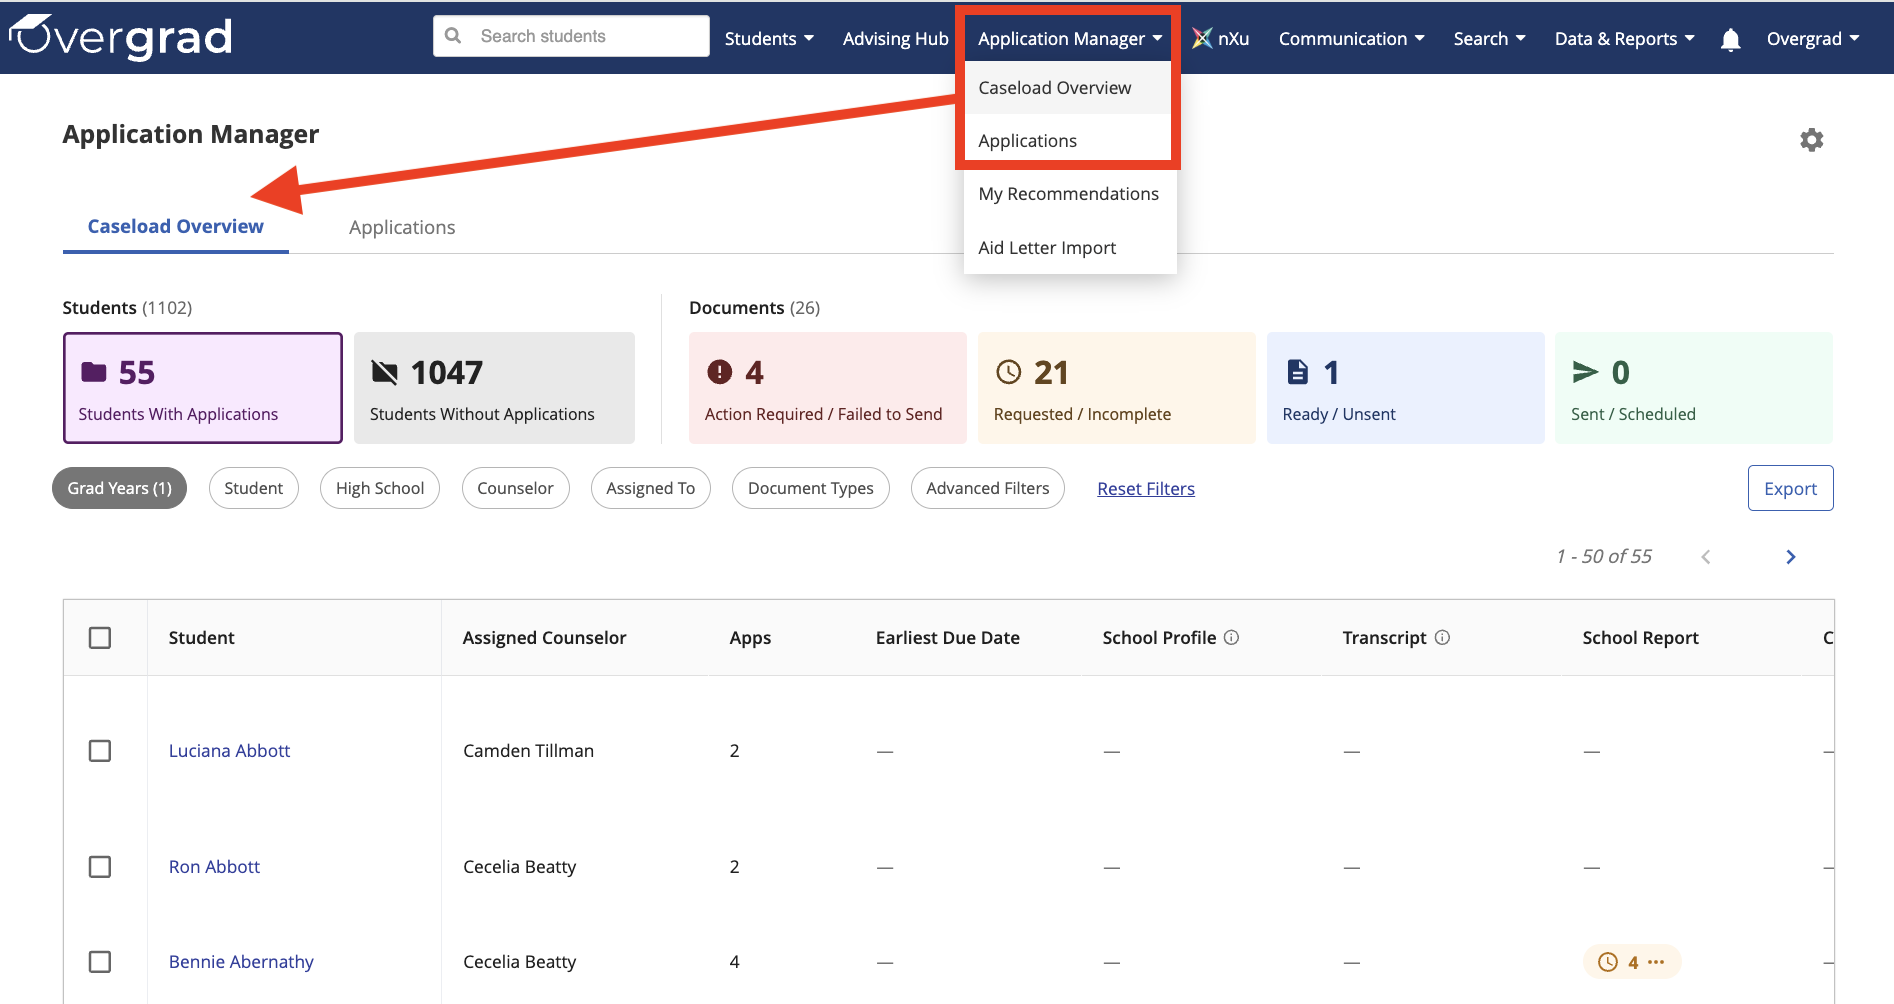
2. You can view and fulfill document requests from either Application Manager tab
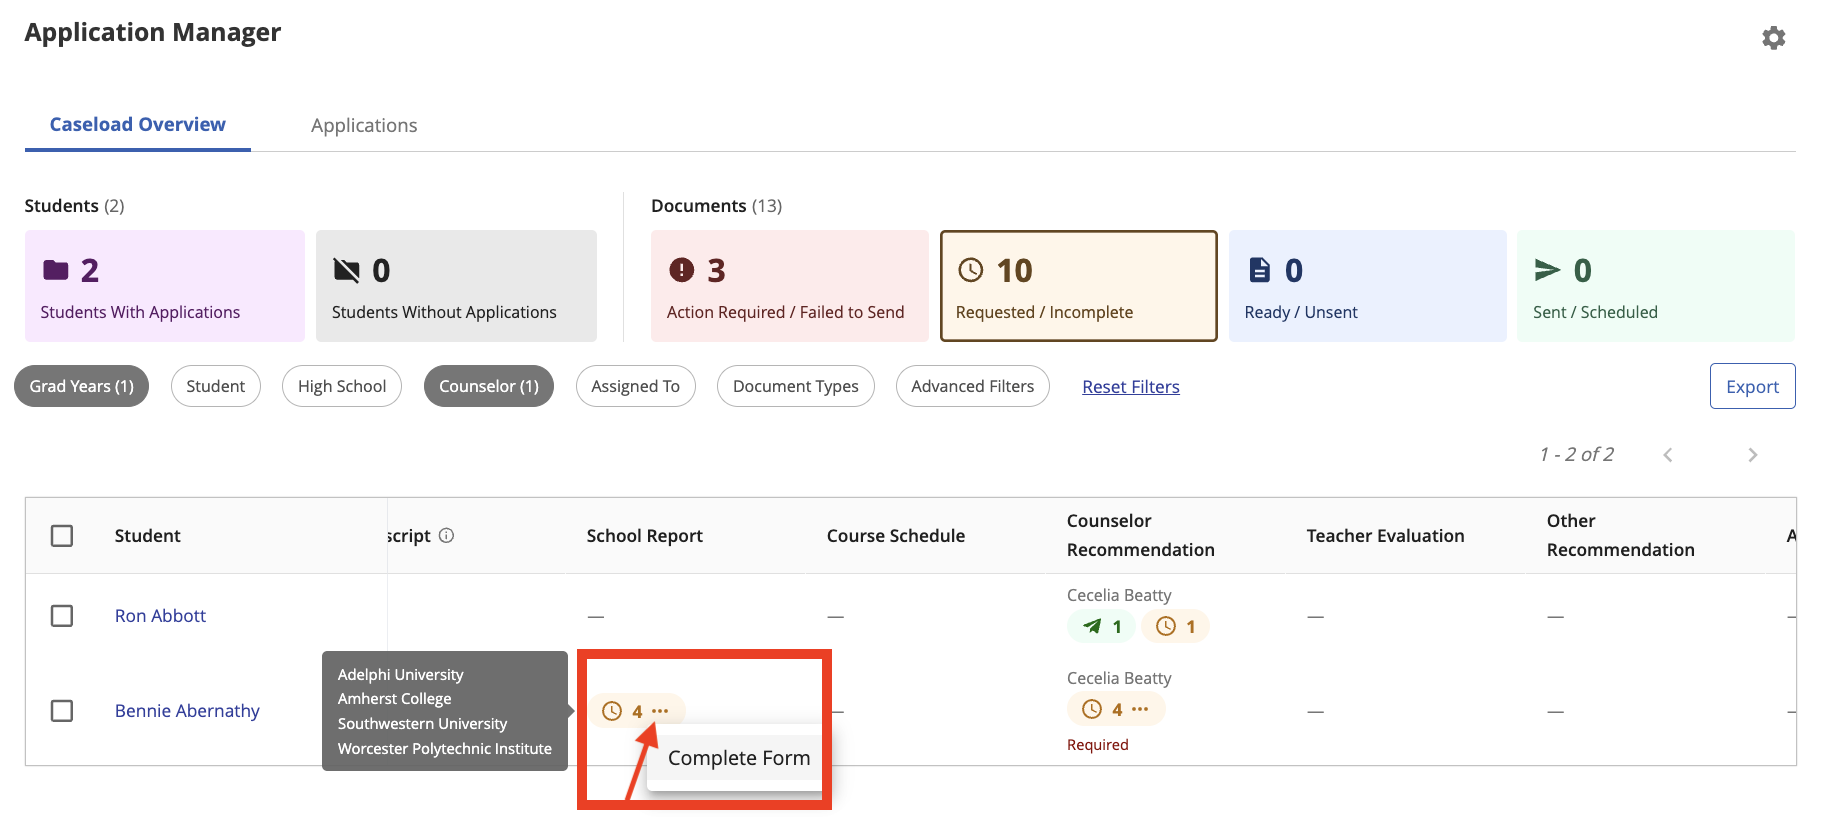
- In Counselor Overview: You can filter your table by selecting specific student subgroup (with Applications or without), by Documents status (Action Required, Requested, Ready, or Sent/Downloaded), and any additional filters desired. Take action by using the . . . menu next to any document listed.
- In Applications: Use the filters on the page to only show specific document types, requests, status, and more. You can filter by the college the request is for, the student who made the request, who the document is assigned to, where the student is applying through (i.e. Common App, Coalition App, etc.), status of the application, document type, status, and due date.
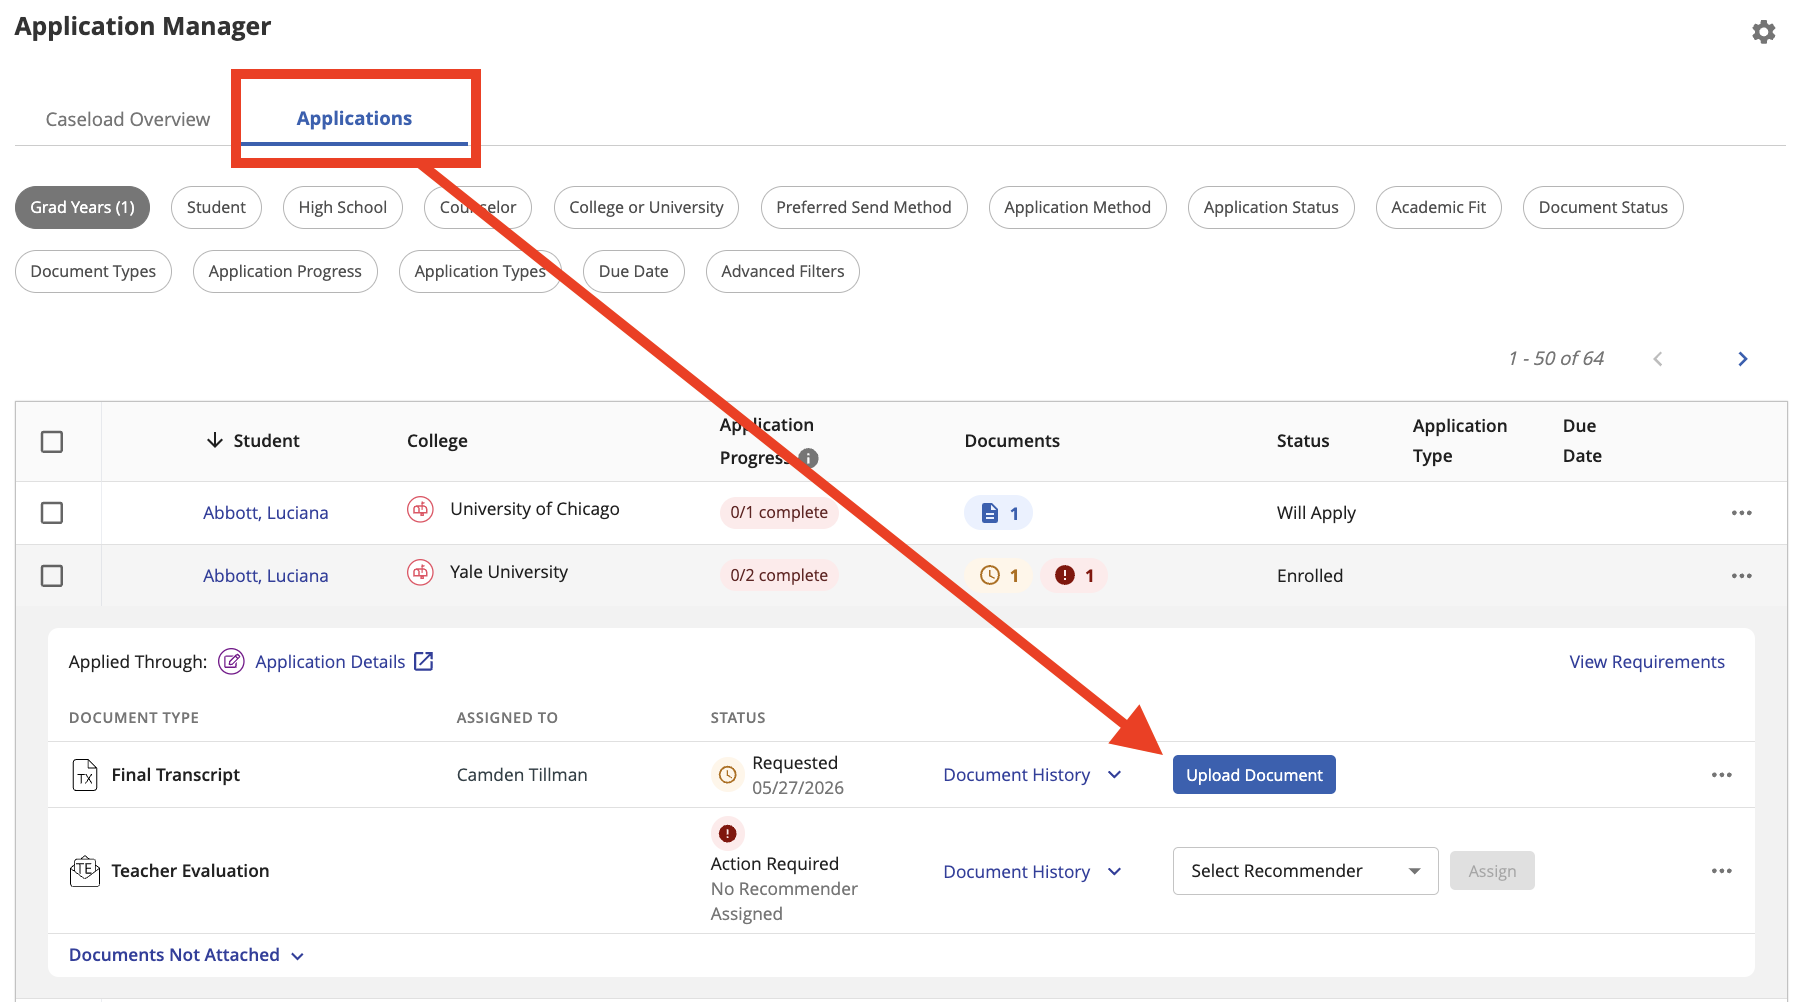
4. To take action (upload documents, resolve action required, and more) by clicking the menu icon (•••) and select Complete Form or Upload Document.
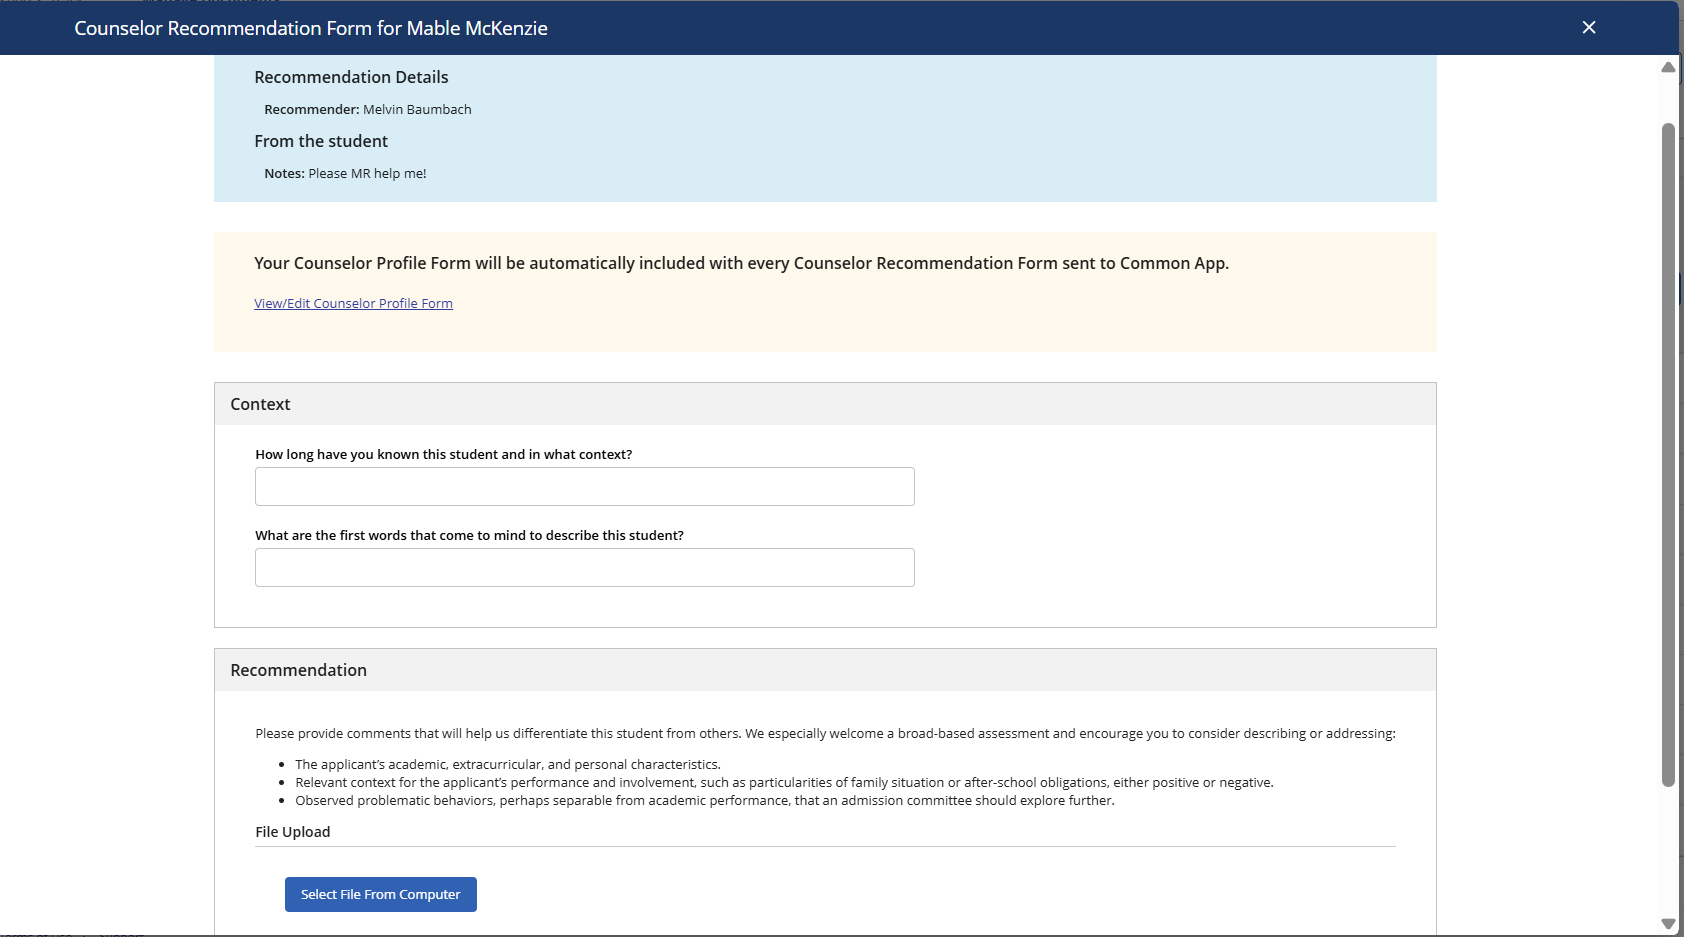
-If you are completing a School Profile for a Common App school and you have not completed the Common App School Profile you will be prompted to complete that first
-If this is for a Letter of Recommendation and the teacher/counselor profile has not been completed you will be prompted to complete that first
5. Select Select File From Computer and a new modal will display.
6. On this screen, you can Upload a File.
7. After uploading the desired document and answering any required questions, select Submit.
Sending Documents
1. You can send any document with the status "Ready" from either Caseload Overview or Applications.
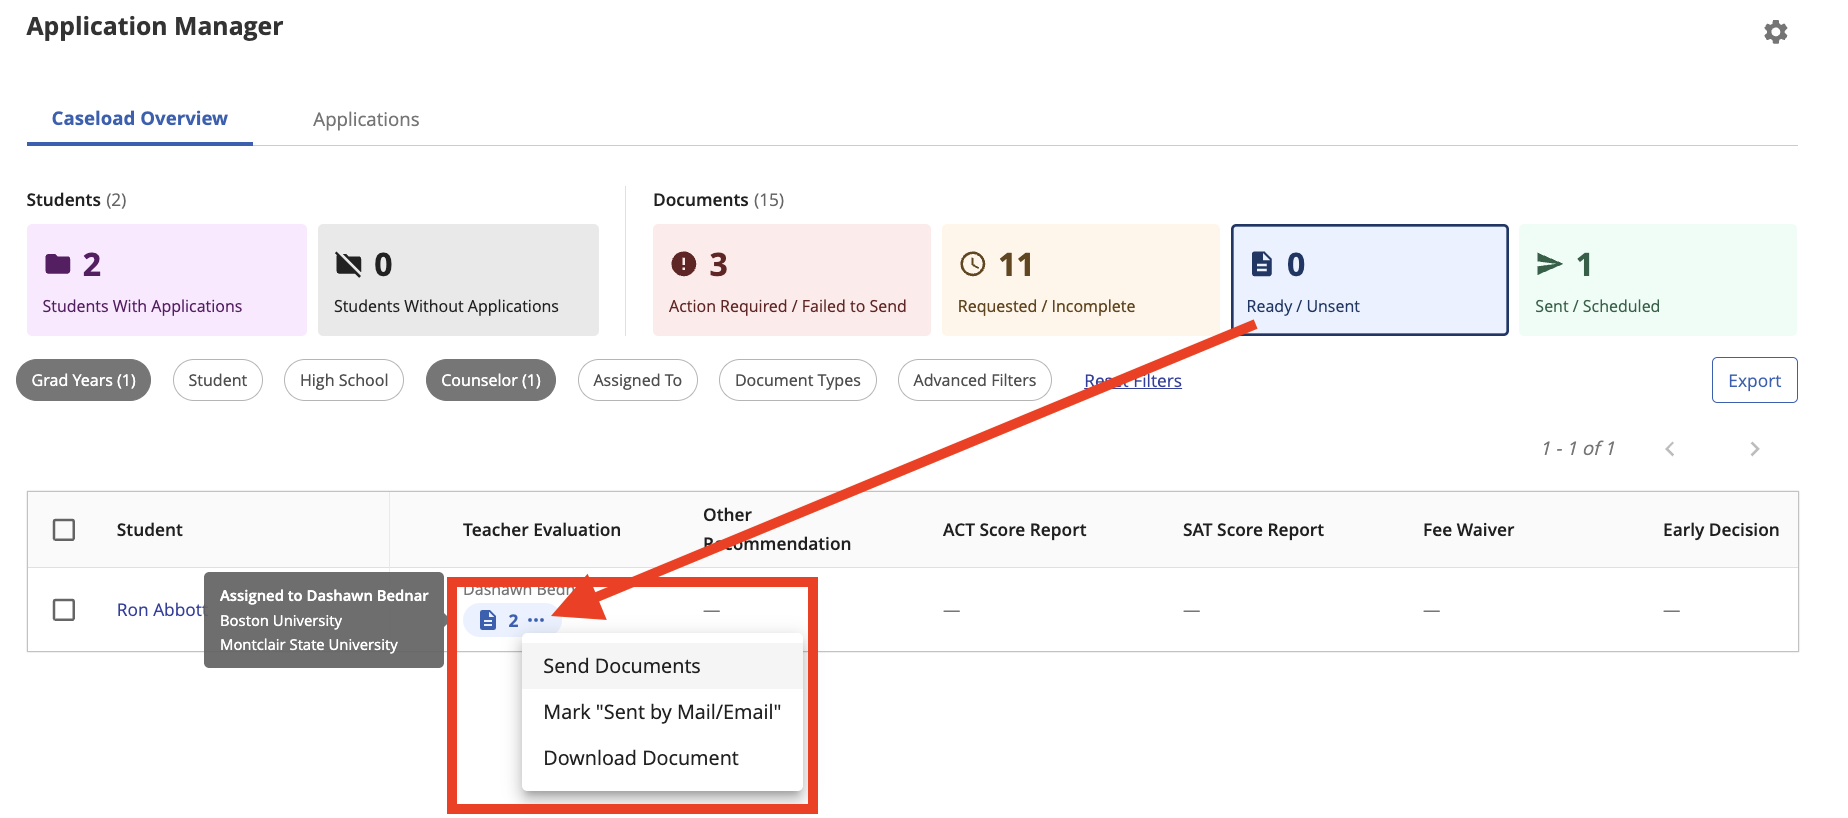
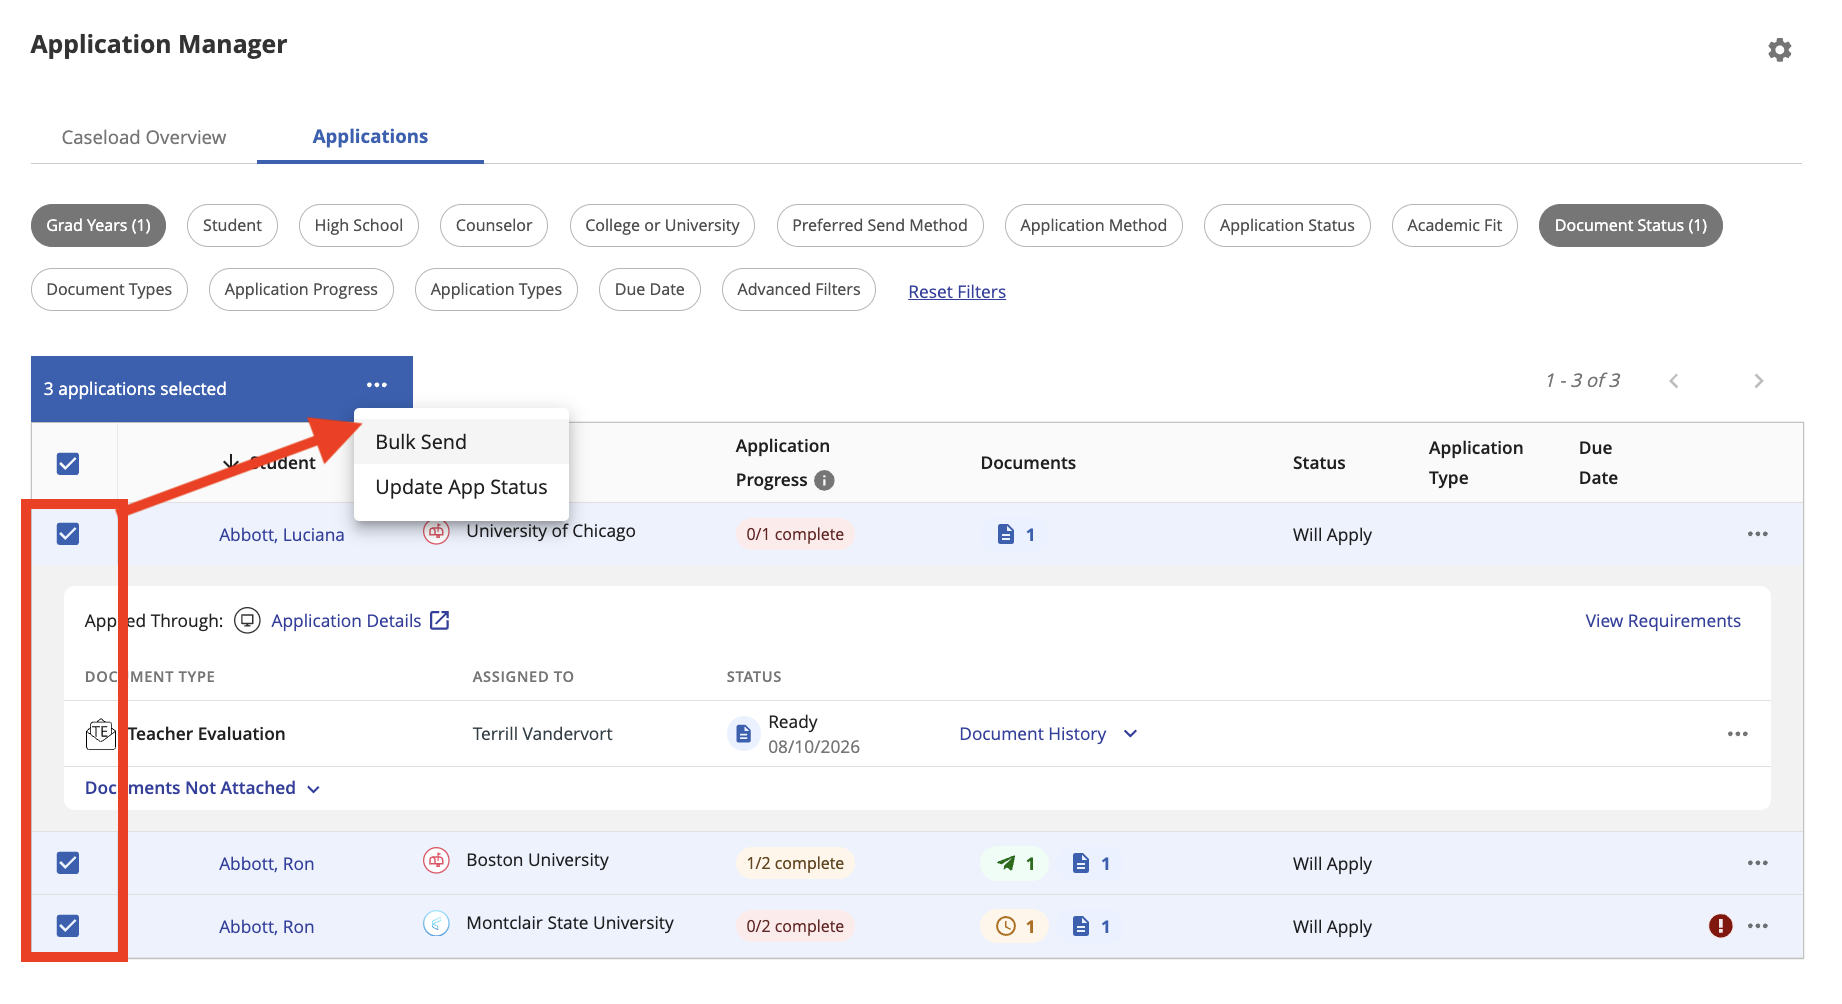
2. Apply filters as desired prior to sending documents individually or in bulk. Suggested filters include: Status – Ready and Counselor.
3. You can send documents by student(s), specific document type, for each application, or multiple applications at once.
Send documents by student(s) by selecting the row, then use the . . . menu to Send Documents.
Select the specific document that is ready, then use the . . . menu to Send Documents.
Select the applications with documents ready to send, then use the . . . menu to Bulk Send.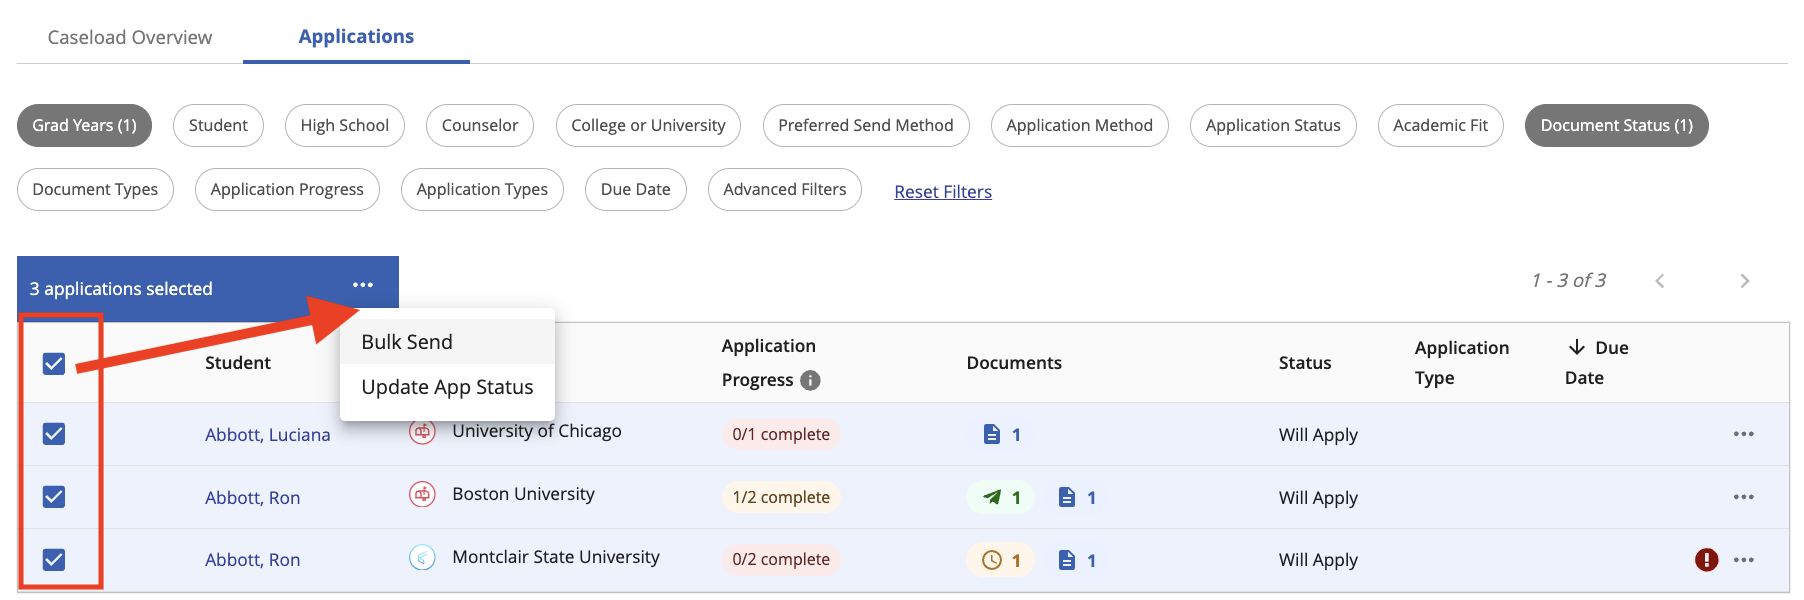
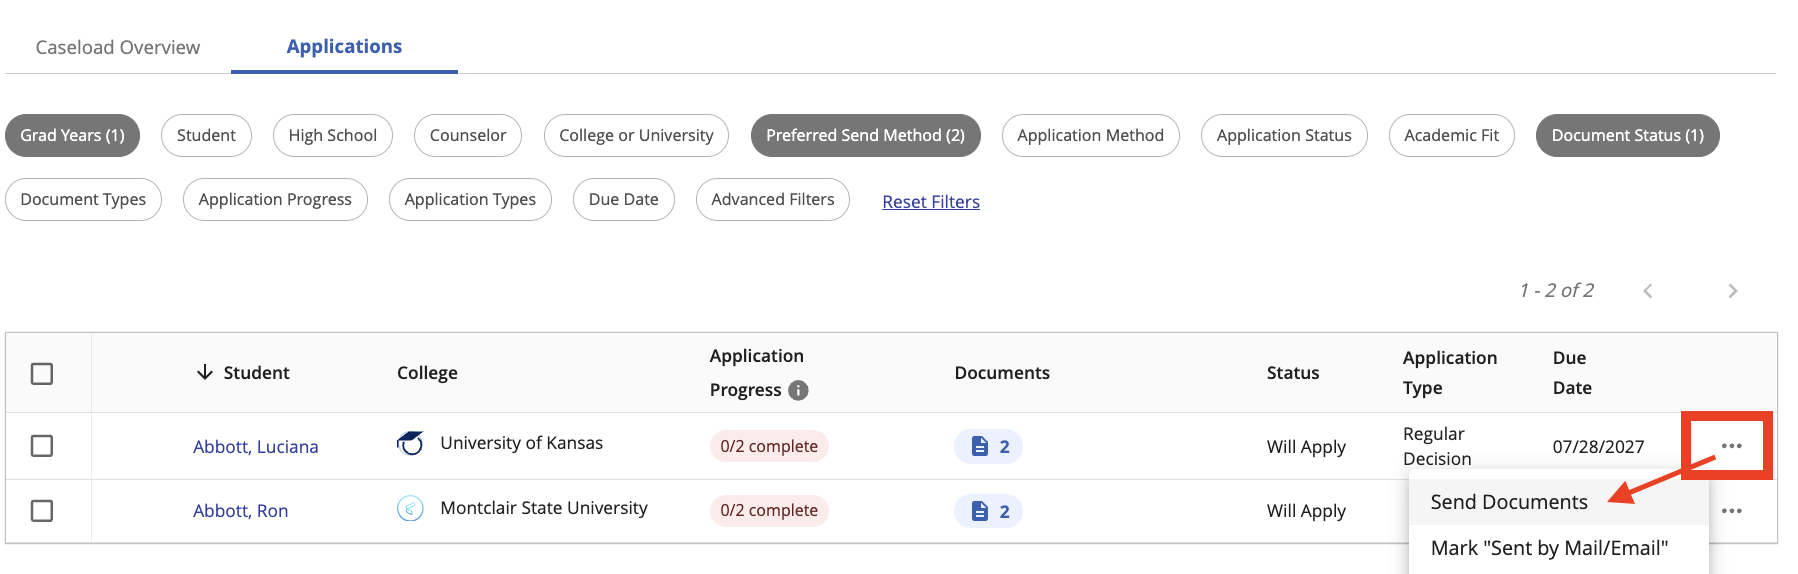
Find or filter for the specific application, then use the . . . menu to Send Documents.
4. Once sent, you'll see the document status symbol under Documents change from a blue check mark to the Common App symbol if sent to Common App, or a green paper airplane if sent directly to the university.


5. When the university has downloaded the file(s), this status will be updated to Downloaded via the cloud symbol with an arrow.
 You can read more about how universities receive documents in Overgrad here.
Was this article helpful?
That’s Great!
Thank you for your feedback
Sorry! We couldn't be helpful
Thank you for your feedback
Feedback sent
We appreciate your effort and will try to fix the article